Convert Inkjet to DTF Printer: Complete SEO Guide

Direct to Film (DTF) printing has quickly become one of the most in-demand technologies in the custom apparel and textile industry. From small home-based businesses to growing print shops, many entrepreneurs are exploring DTF as a powerful alternative to traditional methods like screen printing and direct-to-garment (DTG).
If you already own an inkjet printer, you might be wondering: Can you convert an inkjet printer into a DTF printer?
The short answer is yes — but with specific conditions, proper setup, and realistic expectations.
In this in-depth guide, we’ll explain everything you need to know about converting an inkjet printer into a DTF printer, including:
How DTF printing works
Printer requirements
Step-by-step conversion process
Advantages and limitations
Cost considerations
Maintenance tips
Frequently asked questions
This article is fully original, SEO-optimized, and written in a practical, human-friendly tone to help you make an informed decision.
What Is DTF Printing?
DTF (Direct to Film) printing is a garment decoration method where designs are printed onto a special PET film using water-based pigment inks. The printed film is then coated with adhesive powder and heat-pressed onto fabric.
Unlike DTG, DTF does not require pre-treatment of garments. It also works on a wider range of materials, including:
Cotton
Polyester
Cotton-poly blends
Nylon
Denim
Canvas
Leather
This flexibility makes DTF printing extremely attractive for custom t-shirts, hoodies, tote bags, caps, and more.
How DTF Printing Works (Step-by-Step)
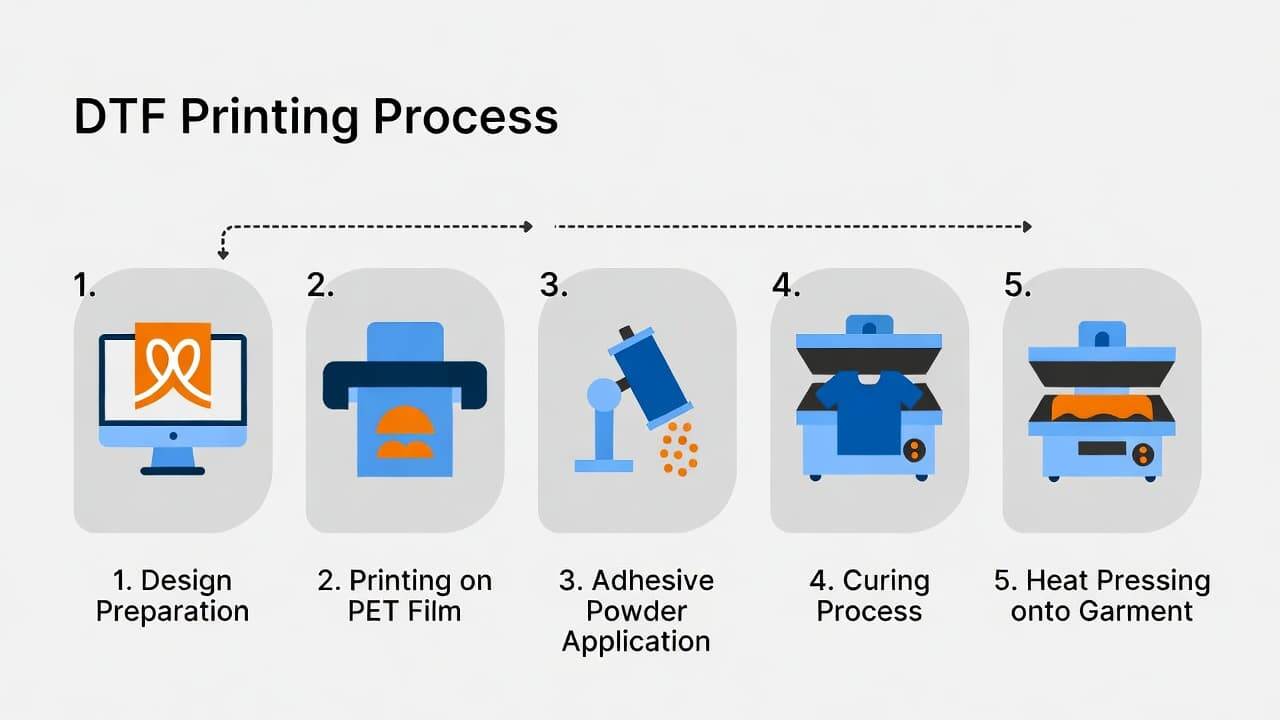
Understanding the workflow helps you better understand what modifications are required when converting an inkjet printer.
1. Design Preparation
Artwork is created or edited using graphic software. A RIP (Raster Image Processor) software is typically used to manage white ink layers and color profiles.
2. Printing on DTF Film
The design is printed onto a special PET DTF transfer film using pigment-based DTF inks, including white ink.
3. Applying Adhesive Powder
While the ink is still wet, a hot-melt adhesive powder is evenly applied to the printed area.
4. Curing the Powder
The film is heated to melt and cure the adhesive powder. This prepares the design for transfer.
5. Heat Press Transfer
The cured film is placed on the garment and heat-pressed at a specific temperature and pressure.
6. Peeling the Film
After pressing, the film is peeled (hot or cold peel depending on the film type), leaving the design permanently bonded to the fabric.
Can You Convert an Inkjet Printer to a DTF Printer?
Yes, it is technically possible to convert certain inkjet printers into DTF printers. However, not all printers are suitable.
Many users modify Epson-based inkjet printers because they use Micro Piezo printhead technology, which works well with pigment inks.
That said, conversion requires:
Replacing regular ink with DTF pigment ink
Installing white ink support
Adjusting printer settings
Using RIP software
Regular maintenance to prevent clogging
It’s not plug-and-play — but with proper setup, it can work effectively.
Why Convert an Inkjet Printer Instead of Buying a DTF Printer?
Here are the main reasons people consider conversion:
1. Lower Initial Investment
A professional DTF printer can be expensive. Converting an existing inkjet printer can significantly reduce startup costs.
2. Ideal for Beginners
If you're testing the DTF business model, conversion allows you to start small without a major financial commitment.
3. Home-Based Business Friendly
For small-scale operations, a converted printer can handle moderate production volumes.
4. Customization Freedom
You can print custom designs for:
T-shirts
Hoodies
Baby wear
Tote bags
Promotional merchandise
Essential Requirements for Inkjet to DTF Conversion
Before you begin, make sure your printer meets the following criteria:
1. Pigment Ink Compatibility
The printer must support water-based pigment inks. Dye-ink-only printers are not suitable.
2. Micro Piezo Printhead
Thermal printheads may struggle with thicker DTF inks. Piezo technology performs better.
3. High Resolution (Minimum 1200 DPI)
Higher resolution ensures sharp details and vibrant color output.
4. White Ink Channel Support
DTF printing requires white ink for underbase layers. Your printer must support this modification.
5. Easy Maintenance Access
DTF printing requires frequent cleaning. Choose a printer that allows easy printhead access.
Materials You’ll Need
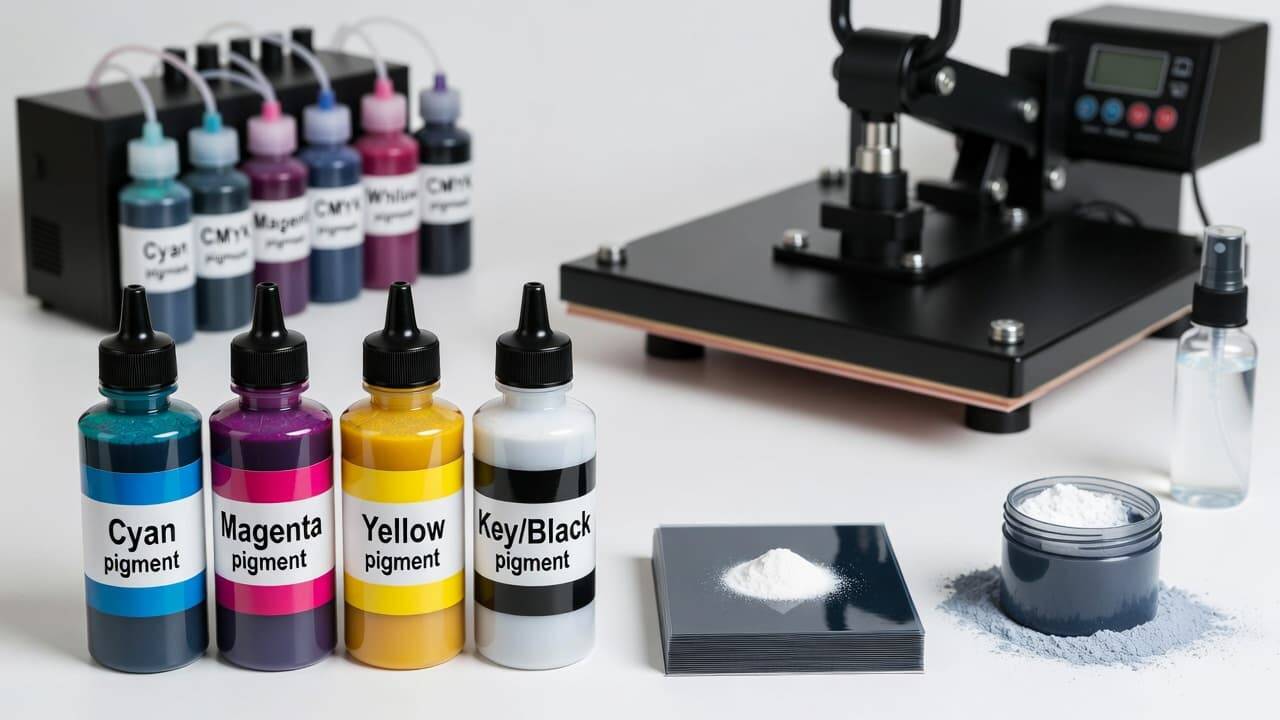
To convert your inkjet printer into a functional DTF printer, gather the following:
DTF pigment inks (CMYK + White)
DTF PET transfer film
Hot melt adhesive powder
Heat press machine
RIP software
Cleaning solution
Syringes or refill tools (for CISS systems)
Step-by-Step: How to Convert an Inkjet Printer to DTF
Step 1: Deep Clean the Printer
If the printer previously used dye ink, flush the system thoroughly to prevent contamination.
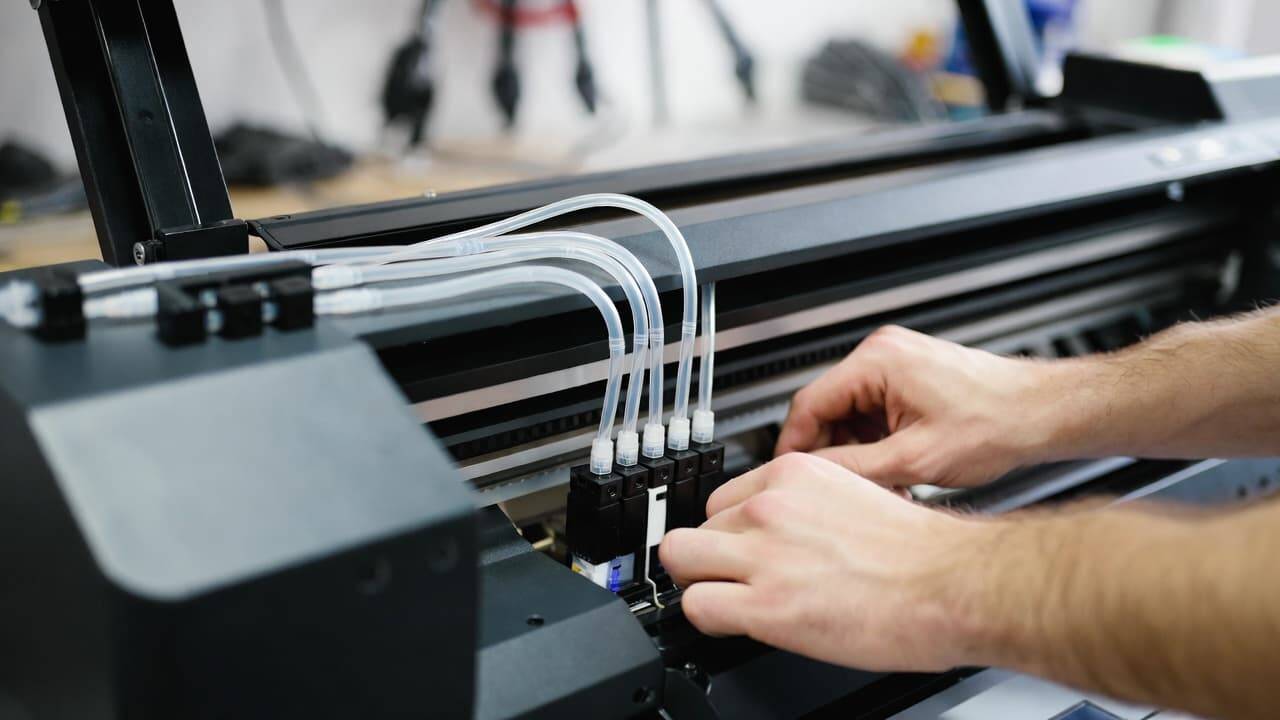
Step 2: Install DTF Ink System
Replace existing cartridges with DTF-compatible pigment inks. Many users install a CISS (Continuous Ink Supply System).
White ink must be installed in a dedicated channel.
Step 3: Install RIP Software
Standard drivers cannot properly manage white ink layers. RIP software is necessary to:
Control white underbase
Mirror images
Optimize ink usage
Step 4: Adjust Printer Settings
Change settings for optimal results:
Print Quality: High or Photo mode
Paper Type: Transparency or Glossy Film
Color Profile: Adjust for pigment ink
Step 5: Print Test Design
Start with small test prints to check:
Color accuracy
White underbase alignment
Ink saturation
Step 6: Apply Adhesive Powder
Immediately after printing:
Evenly sprinkle adhesive powder
Shake off excess powder
Step 7: Cure the Powder
Heat cure at recommended temperature (usually around 160–170°C for a few minutes, depending on powder brand).
Step 8: Heat Press Transfer
Press onto fabric using:
Temperature: 160–170°C
Pressure: Medium to high
Time: 10–20 seconds
Peel according to film instructions (hot or cold peel).
Maintenance Tips for Converted DTF Printers
Maintenance is crucial. DTF white ink can clog easily.
Follow these best practices:
Print daily to prevent clogs
Shake white ink regularly
Perform nozzle checks frequently
Clean printhead weekly
Maintain humidity levels (40–60%)
Neglecting maintenance can permanently damage the printer.
Limitations of Converting an Inkjet Printer
While conversion is possible, it comes with challenges:
1. No Manufacturer Support
Your warranty will likely become void after modification.
2. Slower Production Speed
Converted printers are slower than professional DTF machines.
3. Manual Workflow
Powder application and curing are often manual processes.
4. Ink Clogging Risk
White ink requires constant attention.
Cost Breakdown: Conversion vs Buying a DTF Printer
Conversion Setup (Approximate)
Ink & film starter kit
Adhesive powder
Heat press
RIP software
Total investment is significantly lower than purchasing a commercial DTF printer.
Professional DTF Printer
Higher upfront cost
Faster production
Built-in white ink circulation
Better durability
If you plan high-volume production, investing in a dedicated DTF printer may be smarter long-term.
Who Should Convert an Inkjet Printer?
Inkjet-to-DTF conversion is ideal for:
Beginners starting a custom apparel business
Hobbyists testing product ideas
Small Etsy or Shopify sellers
Low-volume print shops
It may not be suitable for:
Large-scale manufacturers
High-speed production environments
Businesses needing automation
Print Quality: What to Expect
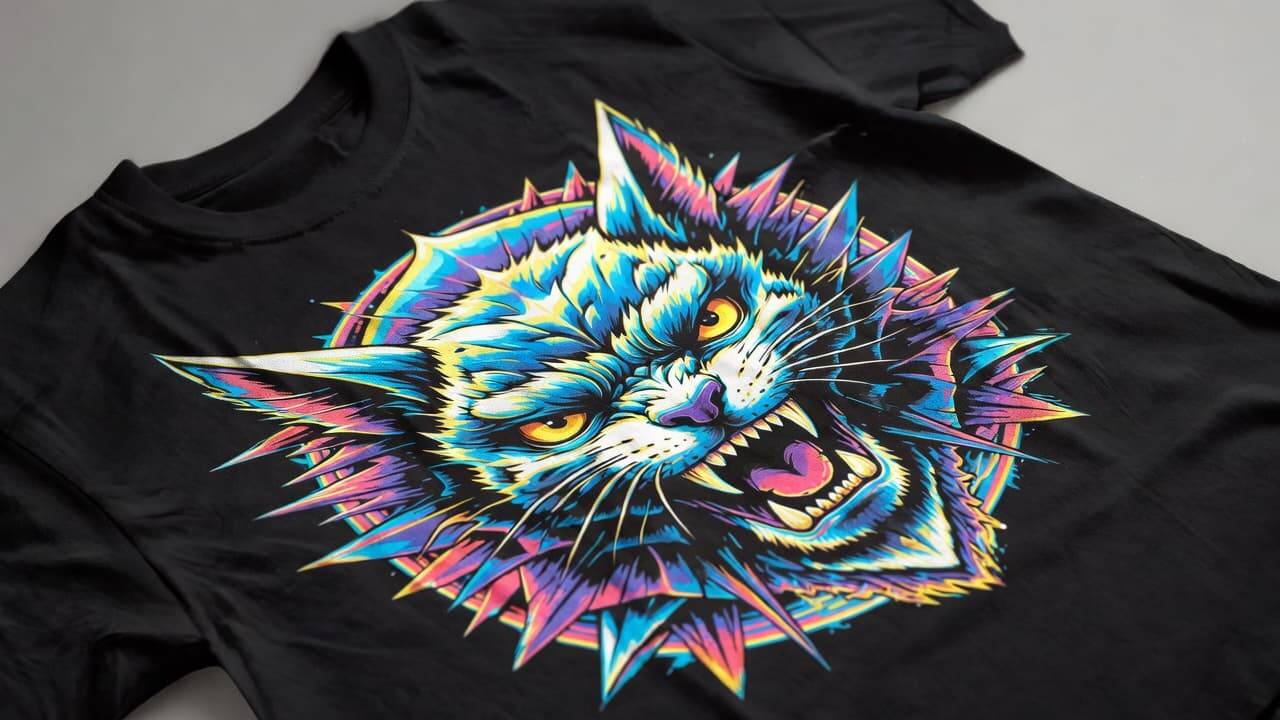
When properly configured, converted printers can produce:
Vibrant colors
Strong adhesion
Wash-resistant prints
Soft hand feel
However, professional DTF printers usually offer:
More consistent white ink flow
Faster printing
Higher production reliability
SEO Benefits of Offering DTF Printing Services
If you're planning to start a website around DTF printing services, this niche has strong search demand. Popular keywords include:
DTF printer setup
Convert inkjet to DTF printer
DTF printing business
Affordable DTF printer
Custom DTF transfers
Optimizing your content with:
Proper H1, H2, H3 headings
Clear FAQs
Keyword-rich paragraphs
Internal linking
Fast-loading pages
will help improve Google rankings.
Common Mistakes to Avoid
Using low-quality adhesive powder
Skipping white ink agitation
Printing without RIP software
Applying too much powder
Incorrect heat press temperature
Avoiding these errors will dramatically improve your success rate.
Is It Worth Converting an Inkjet Printer?
If you want a low-risk entry into the DTF business, conversion can be worth it.
But if you aim to scale quickly and handle large orders, investing in a professional DTF printer may be the smarter move.
Your decision should depend on:
Budget
Production goals
Technical skills
Long-term business plans
Frequently Asked Questions (FAQ)
Can any inkjet printer be converted into a DTF printer?
No. Only compatible models that support pigment inks and preferably Micro Piezo technology are suitable.
Do I need white ink for DTF printing?
Yes. White ink creates the base layer that allows designs to appear vibrant on dark fabrics.
Will conversion damage my printer?
If not maintained properly, it can. White ink clogging is the biggest risk.
How durable are DTF prints?
When applied correctly, DTF prints are highly durable and withstand multiple washes without cracking or fading.
Do I need a heat press machine?
Yes. A heat press is essential for curing adhesive powder and transferring designs to garments.
Final Thoughts
Converting an inkjet printer into a DTF printer is absolutely possible — and for many small businesses, it’s a practical and cost-effective way to enter the custom apparel market.explore our high-quality DTF printers here
With proper setup, quality materials, and consistent maintenance, you can produce professional-grade DTF prints from a modified inkjet printer.
However, always weigh the pros and cons carefully. If your goal is high-volume commercial production, a dedicated DTF printer may offer better long-term value.
Whether you’re starting a side hustle or building a full-scale printing brand, DTF technology opens exciting creative and financial opportunities.
Start smart, maintain properly, and scale strategically.