How to Print Tumblers with Gradient and 3D Effects
Introduction
Printing on tumblers has become an increasingly popular way to customize drinkware for personal use, gifts, or even promotional items for businesses. With advancements in printing technology, creating eye-catching designs featuring gradient and 3D effects is now possible. This blog will guide you through the process of printing tumblers using gradient techniques and adding some unique 3D effects, ensuring your products stand out from the crowd.
What You Need
Before diving into the printing process, gather the necessary materials and tools. Below is a list of essential items you'll need:
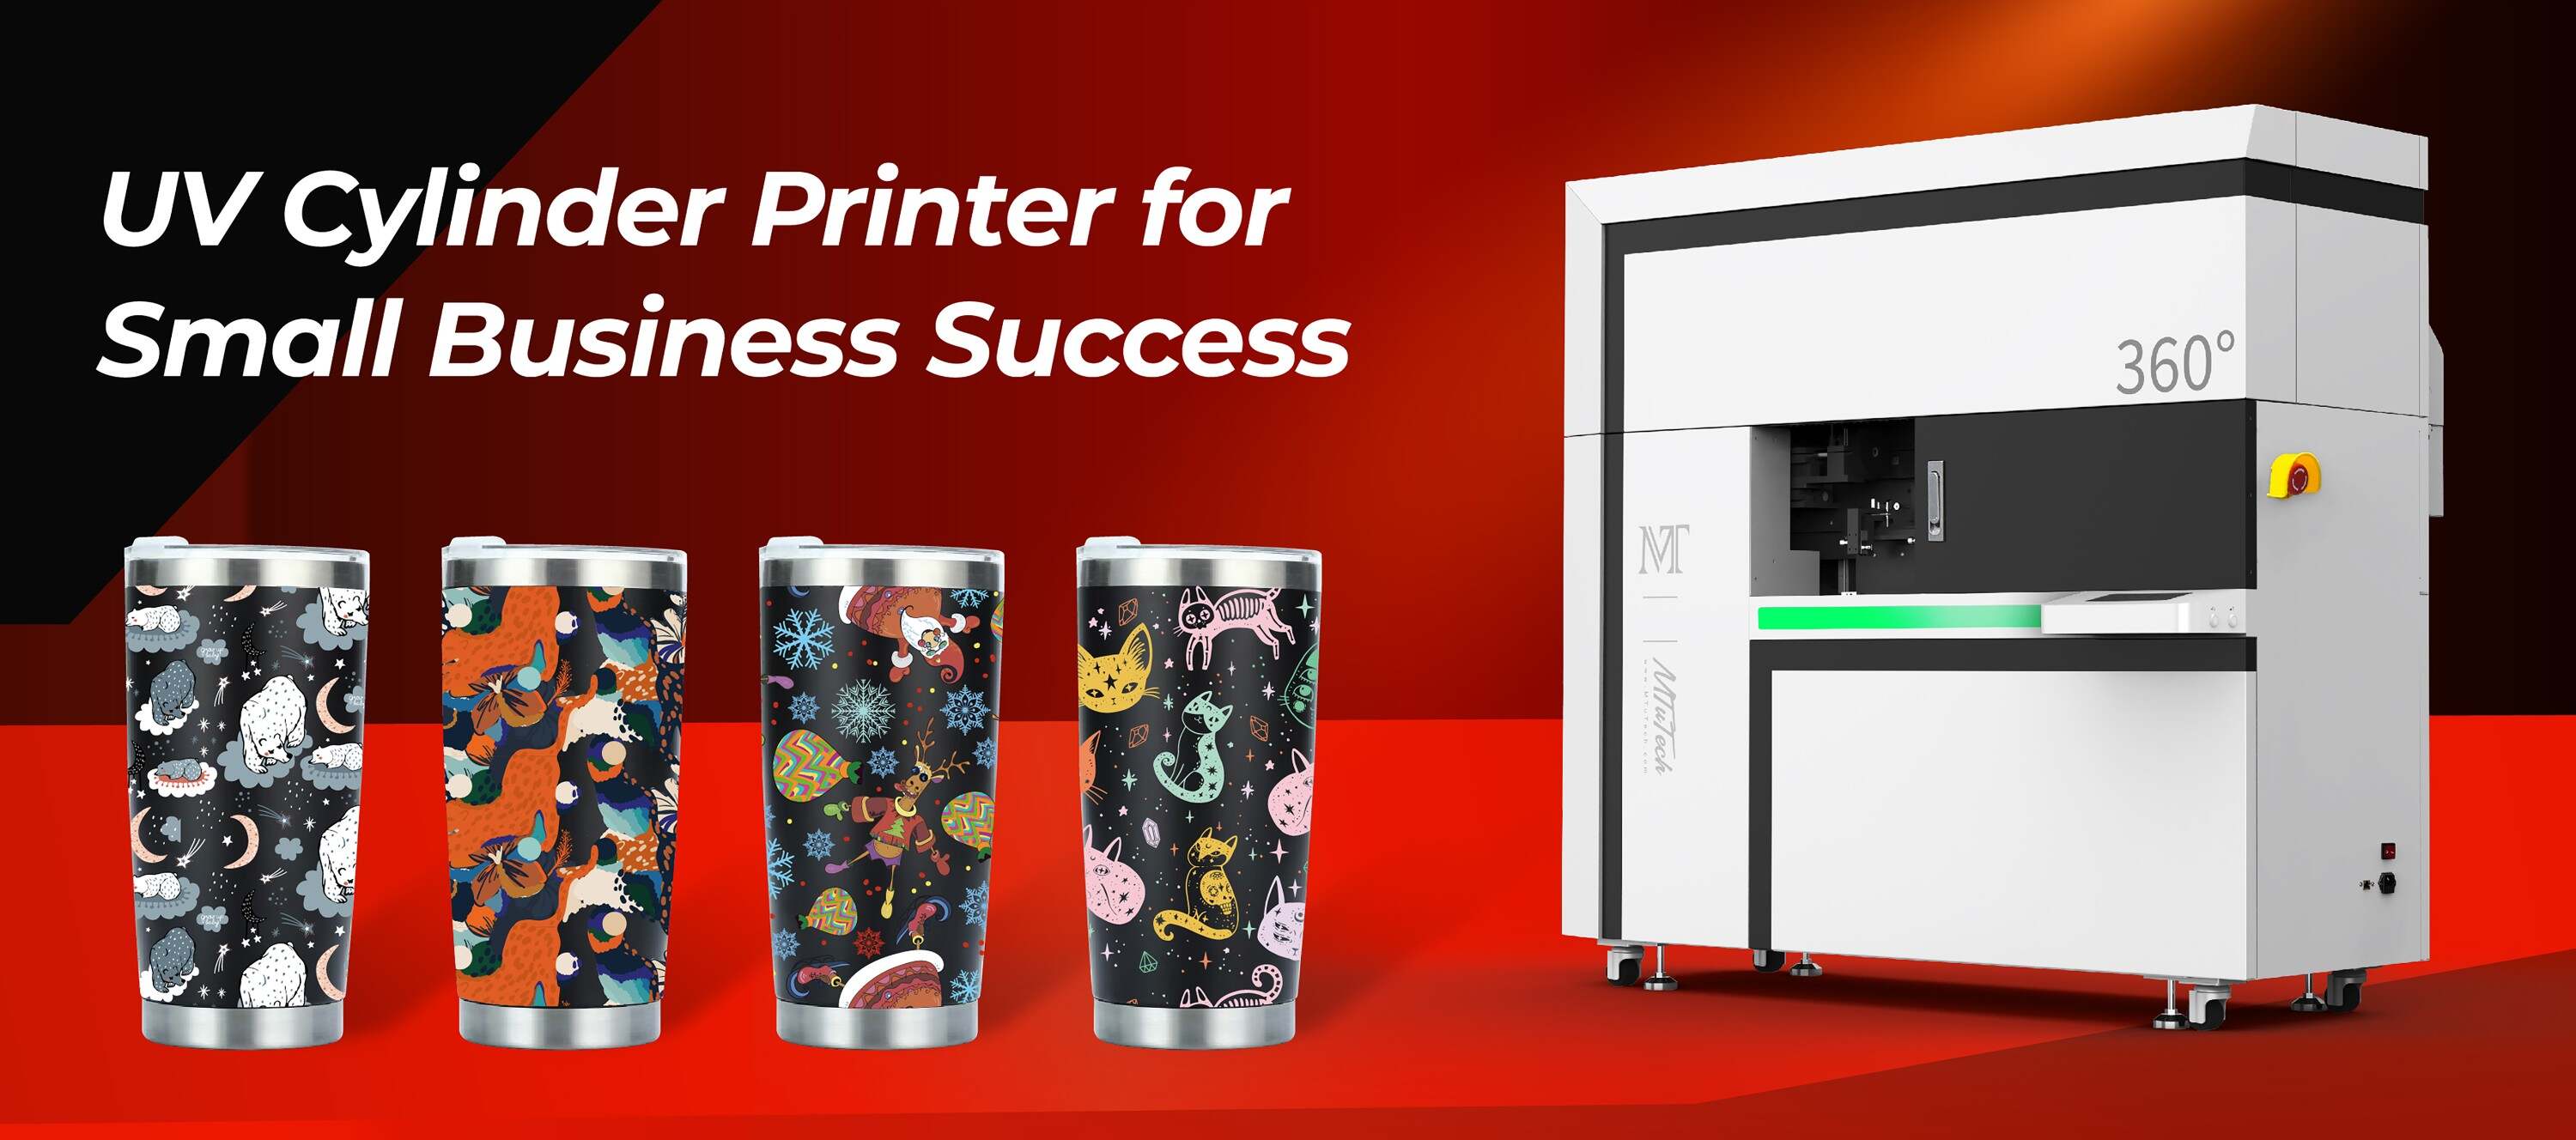
Tumbler Printer: A specialized printer designed for printing on tumblers.
Design Software: Software like Adobe Illustrator or CorelDRAW that allows you to create custom designs.
Blank Tumblers: Choose high-quality, sublimation-ready tumblers for best results.
Transfer Paper: High-quality transfer paper that works with sublimation printers.
Heat Press or Sublimation Oven: To set the ink onto the tumbler.
Protective Gear: Gloves and a face mask for safety when handling heat and materials.
Understanding Gradient Printing
Gradient printing involves blending colors smoothly from one to another. This technique can be applied in various ways, such as vertical, horizontal, or radial gradients. Here are a few tips to achieve stunning gradient effects:
Choosing the Right Color Palette
Select a harmonious color palette that matches your brand or personal style. Use color theory to create pleasing combinations, enhancing the visual appeal of the tumbler.
Employing Design Software
Utilize design software to create gradient backgrounds for your tumbler designs. Many programs have built-in gradient tools that enable you to customize transitions between colors easily. Experiment with different settings like opacity and blending modes for unique effects.
Creating the Gradient Design
Once you have chosen the colors, create your gradient design. Here’s a simple step-by-step:
Open your design software and create a new project with the dimensions of your tumbler.
Use the gradient tool to draw your desired shape or area on the tumbler template.
Adjust the gradient colors, direction, and transparency as needed.
Add additional layers or designs, ensuring they complement the gradient.
Save your design in a suitable file format for printing.
Adding 3D Effects
3D effects add depth and interest to your tumbler designs, engaging your audience further. Here’s how to incorporate 3D effects into your designs:
Using Shadows and Highlights
Add shadows and highlights strategically to create a sense of depth. Here’s how:
Shadows: Darken areas that would be in shadow based on a light source, enhancing the realistic feel.
Highlights: Brighten areas where light hits directly to give the illusion of a raised surface.
Layering Elements
Layering different design elements can give a beautiful 3D effect. This could include overlapping objects, such as text on top of the gradient background, creating some dimension.
Using Software with 3D Capabilities
Some design software, like Blender or Adobe Dimension, allows you to create 3D models and textures. Utilize these tools to create a mockup of your tumbler with realistic lighting and shadows before printing.
Preparing the Design for Printing
After creating your design with gradient and 3D effects, it’s time to prepare it for printing. Follow these steps:
Review Your Design
Check your design for any errors, crooked lines, or misalignments. Zoom in to ensure all elements are crisp and clear.
Setting Up the Tumbler Printer
Make sure your tumbler printer is properly set up and calibrated. This includes:
Loading the correct transfer paper.
Adjusting printer settings such as temperature, speed, and ink flow according to the manufacturer's guidelines.
Running a test print to check colors and resolution.
Printing the Design
Now you can print your design onto the transfer paper. Make sure to mirror your design if required (especially when using logos or text). Once printed, allow the ink to dry completely before handling.
Heat Transfer Process
Once your design is printed and dried, it’s time to transfer it to your tumbler using heat. Here’s how:
Preparation
Clean the tumbler surface thoroughly to remove dust or oils that could affect the print quality. Then, wrap the printed transfer paper around the tumbler, ensuring it fits snugly.
Using a Heat Press or Sublimation Oven
Follow these steps:
Place the tumbler into the heat press or sublimation oven according to the instructions provided.
Set the appropriate temperature and time settings (usually around 400°F for about 60-90 seconds).
Start the heat press or oven and monitor the process. Make sure to follow safety guidelines.
Cooling and Finishing Touches
Once the time is up, carefully remove the tumbler from heat. Be cautious, as it will be hot! Let the tumbler cool completely before peeling off the transfer paper. You can finish with any additional coatings, if desired, to enhance durability.
Benefits of Printing Tumblers with Gradient and 3D Effects
Printing tumblers with gradient and 3D effects offers numerous advantages:
Visual Appeal: Unique and colorful designs attract attention and stand out in a crowded marketplace.
Customization: Personalization options make tumblers great gifts or promotional items.
Durability: High-quality printing methods ensure that the designs last, resisting fading and wear.
Versatility: Can be used for various occasions, from personal use to corporate branding.
Conclusion
Printing tumblers with gradient and 3D effects allows for creativity and personalization like never before. With the right tools, materials, and a bit of practice, you can create stunning designs that resonate with customers or loved ones alike. Whether you're looking to start a new business venture or simply want to enjoy a unique tumbler for yourself, the possibilities are endless!
For those interested in further enhancing your printing capabilities, explore our high-quality tumbler printers here. Investing in the right equipment will ensure you achieve the best results in your printing endeavors.
FAQ
Can I use any printer for tumbler printing?
Not all printers are suited for tumbler printing. It's best to use a specialized tumbler printer designed for sublimation or UV printing to achieve high-quality results.
Is gradient printing more expensive than regular printing?
Gradient printing can be slightly more expensive due to the complexity involved in creating the designs. However, the final product's visual appeal often justifies the additional cost.
What type of design software do you recommend for beginners?
For beginners, software like Canva is user-friendly and offers gradient features. As you become more comfortable, you might explore more advanced options like Adobe Illustrator or CorelDRAW.
How can I ensure my designs are printable quality?
Always use high-resolution images (at least 300 DPI) and check your design's dimensions against the tumbler's specifications to ensure they fit properly when printed.
```