DTG Printer Banding and Fading Problems Solved
Have you ever printed a beautiful design on a T-shirt using your DTG printer, only to notice unwanted lines across the image or colors that look dull after washing? If yes, you’re not alone. Banding and fading are two of the most common challenges in Direct to Garment printing.
The good news? Both problems are fixable.
In this comprehensive guide, we’ll break down what causes banding and fading in DTG printing, how to fix them step by step, and how to prevent them in the future. Whether you run a garment printing business or you’re just getting started, this SEO-friendly, website-ready article will help you improve print quality and reduce costly mistakes.
Introduction to DTG Printing
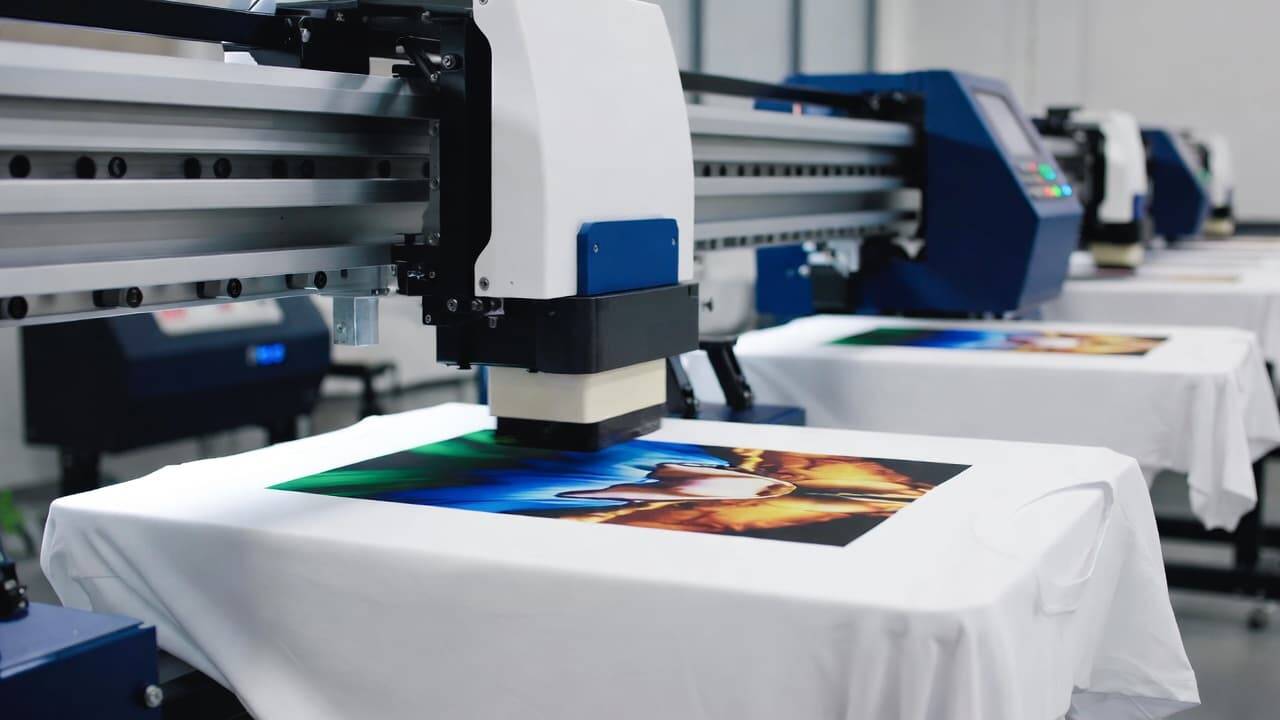
Direct to Garment (DTG) printing is one of the most advanced textile printing technologies available today. It allows you to print high-resolution, full-color images directly onto cotton and cotton-blend fabrics using specialized water-based inks.
DTG printing is widely used for:
Custom T-shirts
Fashion brands
Print-on-demand businesses
Small-batch apparel production
Promotional merchandise
The biggest advantage of DTG printers is their ability to capture fine details, gradients, and photorealistic designs. However, like any digital printing system, DTG printers require proper maintenance and correct process control.
Two major quality issues that printers often face are:
Banding (lines appearing in prints)
Fading (loss of color vibrancy over time)
Let’s understand these problems in depth.
What Is Banding in DTG Printing?
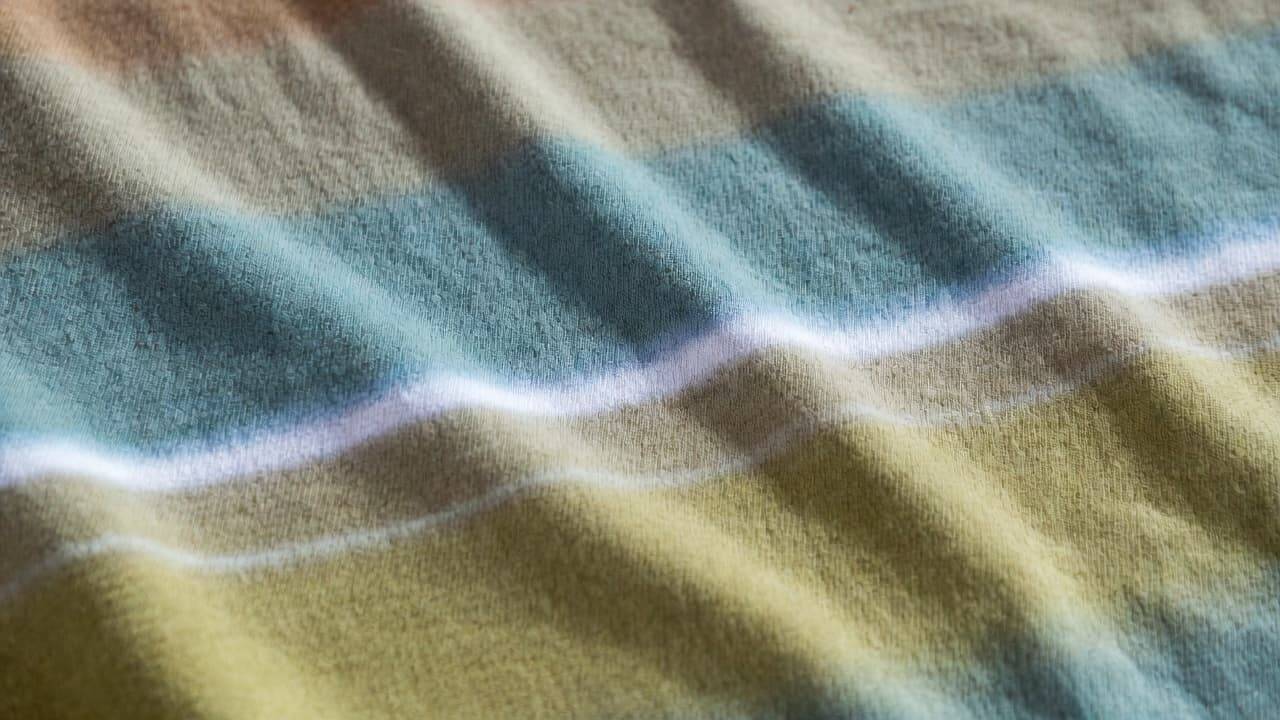
Banding refers to unwanted horizontal lines or streaks that appear across your printed design. These lines disrupt the smooth appearance of the image and reduce overall print quality.
How Banding Looks
Thin white horizontal lines
Uneven ink distribution
Striped or streaked appearance
Inconsistent color density
Banding is especially noticeable in solid color areas or large background prints.
What Causes Banding in DTG Prints?
Several technical factors can cause banding. Understanding the root cause is the first step to solving the problem.
1. Clogged Print Head Nozzles
The most common cause of banding is clogged nozzles in the print head. DTG inks contain pigments that can settle or dry if the printer is not used regularly.
When certain nozzles are blocked:
Ink is not sprayed evenly
Missing lines appear in the design
Print quality becomes inconsistent
2. Misaligned Print Heads
If the print head alignment is off, ink droplets may not land correctly on the fabric. This results in visible horizontal lines or slight overlaps that look like banding.
3. Low Ink Levels
Running ink cartridges close to empty can introduce air into the system, leading to uneven ink flow and visible lines.
4. Incorrect Print Settings
Improper resolution settings, pass count, or platen height adjustments can also create banding.
5. Poor Fabric Surface
Uneven fabric texture or lint buildup can interfere with smooth ink deposition.
How to Fix Banding in DTG Printing
Now let’s discuss practical solutions to eliminate banding and restore print quality.
Perform a Nozzle Check
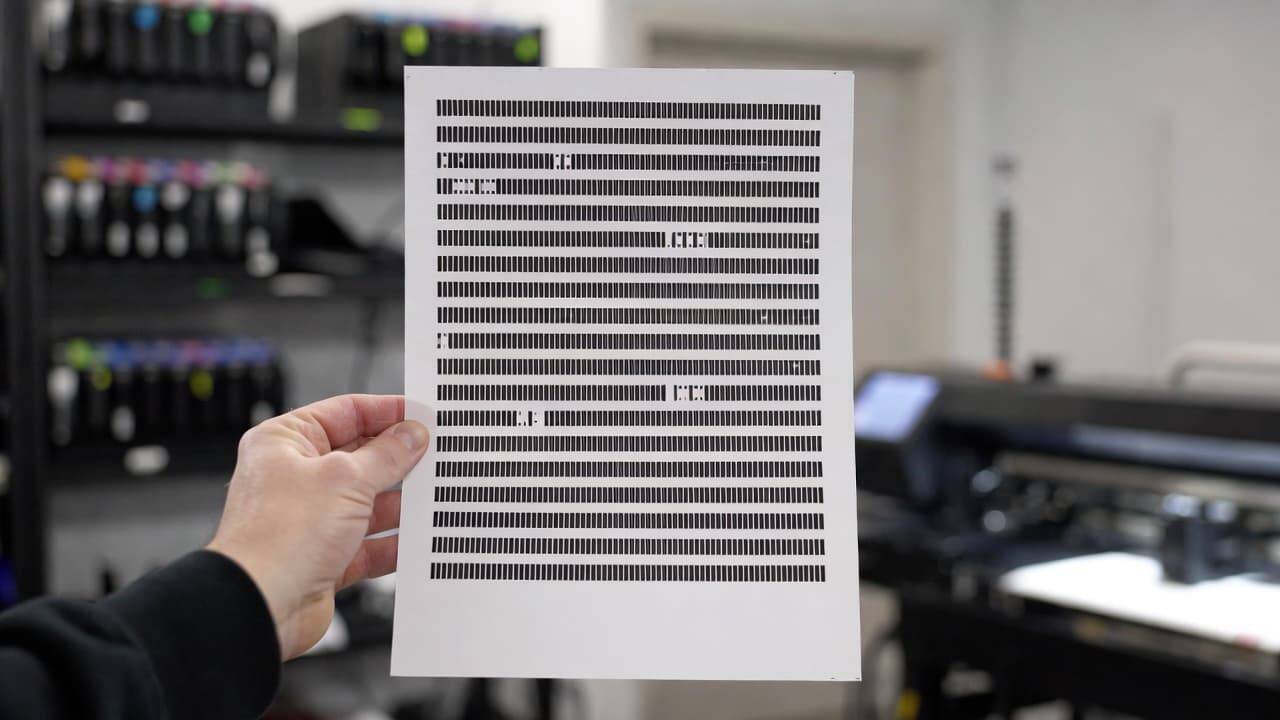
Most DTG printers come with a built-in nozzle check feature. Run a nozzle test pattern to identify which nozzles are clogged.
If gaps appear in the test print:
Perform a print head cleaning cycle
Repeat the nozzle check
Avoid excessive cleaning to prevent ink waste
Regular nozzle checks are essential for consistent DTG printing performance.
Clean the Print Heads Properly
If standard cleaning does not fix the issue:
Use manufacturer-recommended cleaning solutions
Perform a manual cleaning (if required)
Ensure the capping station is clean
Never use harsh chemicals, as they can permanently damage the print head.
Align the Print Heads
Print head alignment ensures that ink droplets land precisely on the garment.
Steps typically include:
Access alignment settings in printer utility software
Print alignment pattern
Adjust settings based on instructions
Reprint test image
After alignment, print a sample design to confirm the issue is resolved.
Check Platen Height
If the garment is too far from or too close to the print head, ink may not distribute evenly.
Make sure:
Fabric lies flat
No wrinkles are present
Platen height matches garment thickness
Maintain a Clean Printing Environment
Dust, lint, and fabric fibers can affect print performance.
Best practices include:
Lint-rolling garments before printing
Keeping workspace clean
Storing inks properly
Printing regularly to prevent ink drying
What Is Fading in DTG Printing?
Fading occurs when printed colors appear dull, washed out, or lose vibrancy after washing. Unlike banding, fading may not be visible immediately after printing but becomes noticeable over time.
Common Causes of Fading in DTG Prints
1. Incorrect Pre-Treatment Application
Pre-treatment is essential for dark garments and sometimes even light fabrics. It helps white ink bond to the fibers and enhances color vibrancy.
If pre-treatment is:
Applied unevenly
Too little
Too much
The result can be dull or faded prints.
2. Improper Curing Process
Curing locks the ink into the fabric. Without proper heat and time:
Ink sits on the surface
Wash durability decreases
Colors fade quickly
Heat presses or conveyor dryers are commonly used for curing.
3. Incorrect Temperature Settings
If curing temperature is too low:
Ink doesn’t bond properly
If temperature is too high:
Ink may scorch
Fabric may burn
Colors may shift
4. Poor Quality Garments
Not all fabrics are suitable for DTG printing. Low-quality cotton blends may not absorb ink effectively.
For best results:
Use 100% ring-spun cotton
Choose tightly woven garments
Avoid heavily treated fabrics
5. Overwashing or Harsh Detergents
Even perfectly printed garments can fade if customers:
Wash in hot water
Use strong detergents
Dry at high heat
Providing proper wash care instructions can significantly improve print longevity.
How to Fix and Prevent Fading in DTG Prints
Optimize the Pre-Treatment Process
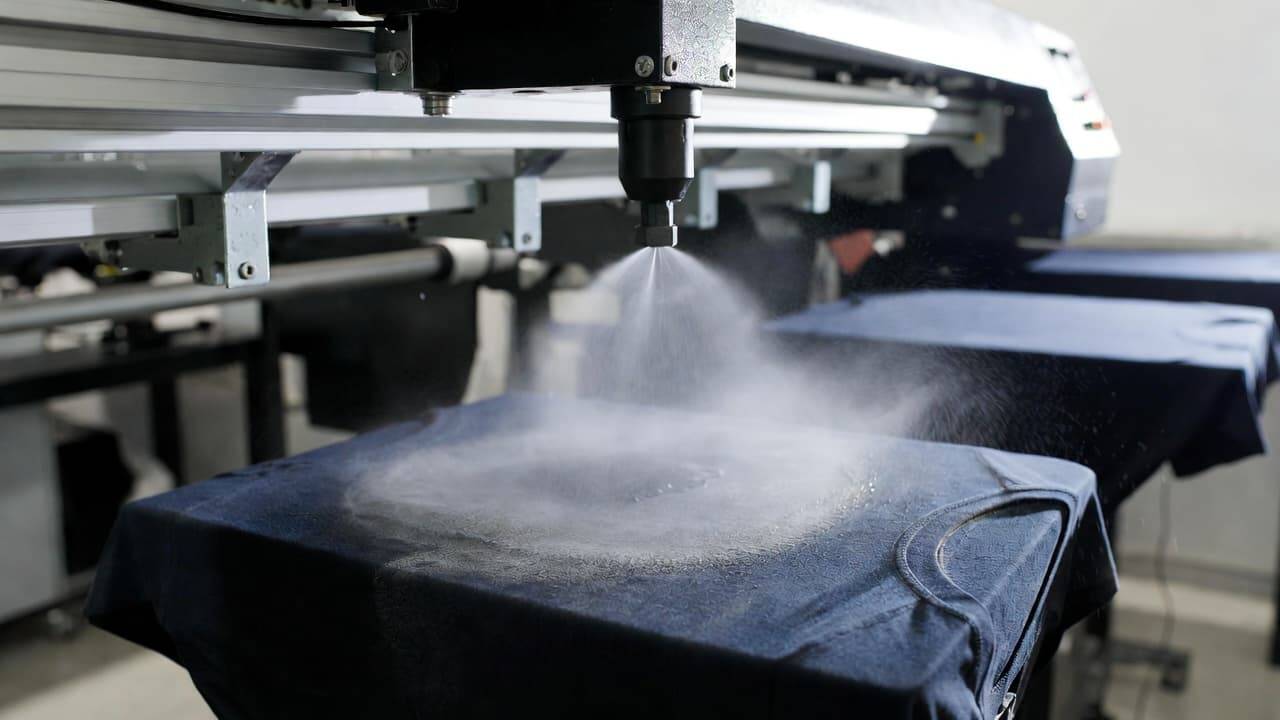
To achieve consistent results:
Use a high-quality pre-treatment solution
Apply evenly using a spray machine or automatic pre-treater
Avoid pooling or oversaturation
Heat press pre-treatment before printing
Proper pre-treatment dramatically improves color brightness and wash durability.
Follow Correct Curing Guidelines
Always follow the manufacturer’s curing instructions.
Typical curing parameters:
Temperature: 160–170°C (may vary by ink brand)
Time: 60–180 seconds
Even pressure distribution
Use a temperature gun to verify actual heat press temperature.
Test Before Bulk Production
Before printing large orders:
Print a test sample
Cure properly
Wash test the garment
Evaluate color retention
This small step prevents large financial losses.
Use High-Quality DTG Inks
Cheap or incompatible inks can compromise durability.
Always:
Use recommended inks
Store inks at proper temperatures
Shake white ink daily to prevent settling
Provide Wash Care Instructions to Customers
Educate customers to:
Wash inside out
Use cold water
Avoid bleach
Air dry or tumble dry low
This ensures long-lasting DTG prints.
Preventive Maintenance Tips for DTG Printers
Preventing issues is always better than fixing them later. Here’s a simple maintenance checklist:
Daily Maintenance
Perform nozzle check
Clean around print head area
Shake white ink cartridges
Weekly Maintenance
Clean capping station
Inspect wiper blade
Check ink levels
Monthly Maintenance
Deep clean printer
Inspect tubing and dampers
Run alignment tests
Consistent maintenance extends the life of your DTG printer and ensures professional-quality output.
Choosing the Right DTG Printer for Better Results
Investing in a reliable DTG printer reduces common printing issues significantly.
When selecting a DTG printer, consider:
Print resolution
Ink compatibility
Automatic maintenance features
Built-in pre-treatment systems
Technical support availability
Advanced DTG printers come with automated cleaning cycles and smart monitoring systems that reduce banding and fading risks.
Troubleshooting Checklist for Quick Diagnosis
If you experience banding or fading, ask yourself:
Did I perform a nozzle check?
Is the print head aligned?
Was pre-treatment applied evenly?
Did I cure at the correct temperature and time?
Is the garment suitable for DTG printing?
Are the inks fresh and well-mixed?
Systematically checking these factors will quickly identify the root cause.
Frequently Asked Questions (FAQ)
What is the main reason for banding in DTG printing?
The primary cause of banding is clogged print head nozzles or misaligned print heads. Regular maintenance significantly reduces this issue.
Why do DTG prints fade after washing?
Fading usually occurs due to improper pre-treatment, incorrect curing, or poor fabric quality. Ensuring correct application and curing settings helps prevent this.
How often should I clean my DTG printer?
Daily nozzle checks and regular cleaning cycles are recommended. Deep cleaning should be done monthly or as suggested by the manufacturer.
Can over-curing cause fading?
Yes. Excessive heat can degrade ink pigments and damage fabric fibers, leading to reduced vibrancy.
Is DTG printing long-lasting?
When done correctly with proper pre-treatment, curing, and garment selection, DTG prints can last for many washes without noticeable fading.
Final Thoughts
Banding and fading in DTG printing can feel frustrating, especially when you’re working on important orders. However, these issues are rarely random. In most cases, they are caused by identifiable and fixable factors such as clogged nozzles, misalignment, improper pre-treatment, or incorrect curing.
By implementing routine maintenance, optimizing your pre-treatment process, and following accurate curing guidelines, you can dramatically improve print quality and durability.
Remember, successful DTG printing is not just about owning a good printer—it’s about understanding the process and controlling every step carefully.
With the right knowledge and consistent practices, you can produce vibrant, professional, and long-lasting DTG prints that keep your customers satisfied and your business growing.
Explore our high-quality DTG printers here