DTG Printer Settings Guide for Light and Dark Garments
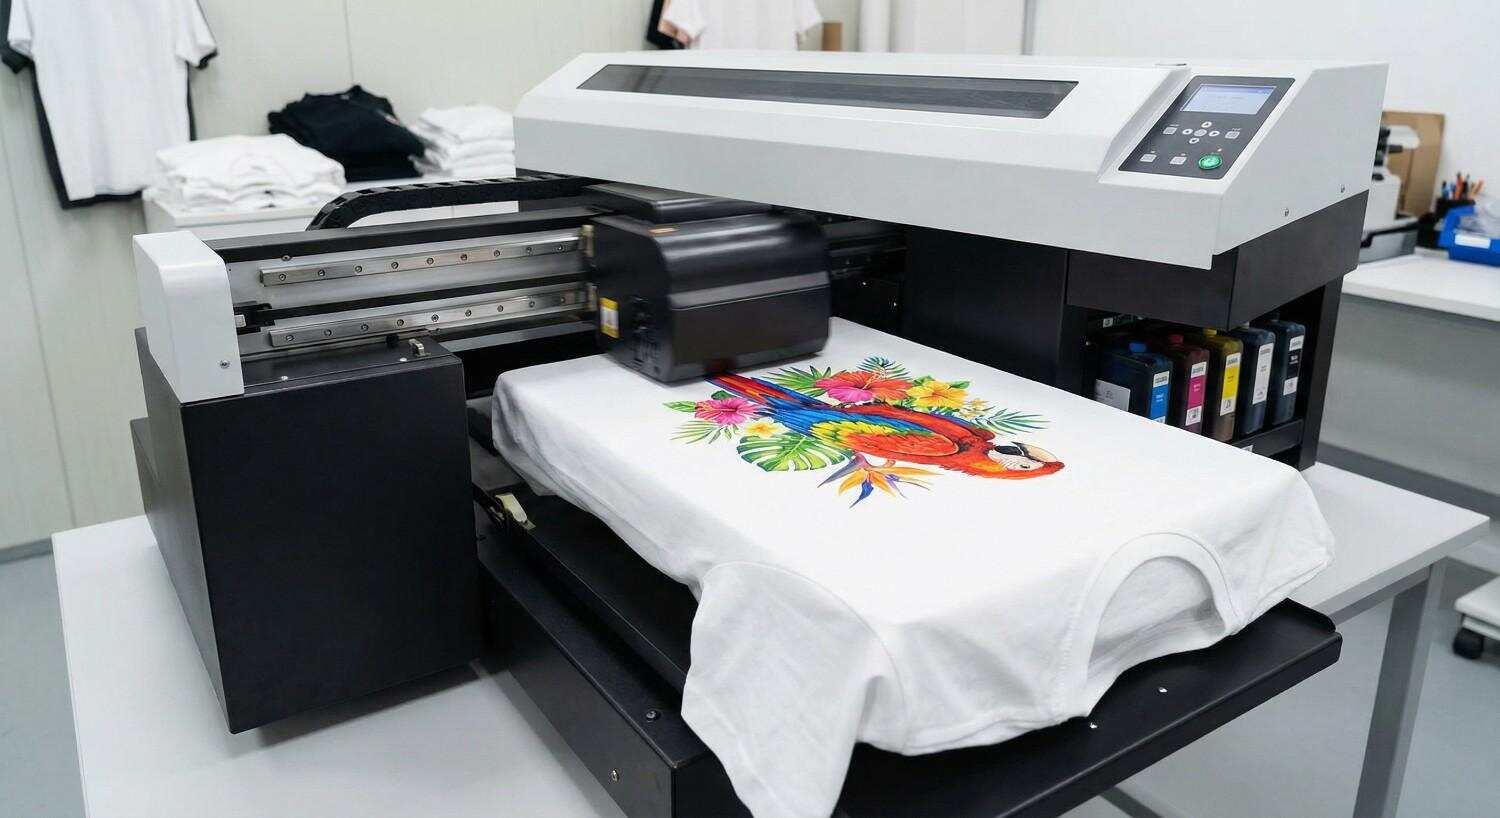
Direct-to-Garment (DTG) printing has transformed the custom apparel industry by making it possible to print full-color, high-detail designs directly onto fabric. From startups entering the garment decoration market to established print shops scaling production, DTG printers have become an essential tool for producing professional-quality apparel with speed and flexibility.
However, owning a DTG printer alone does not guarantee premium results. One of the most critical factors that separates average prints from outstanding ones is proper print settings optimization. Every garment behaves differently under ink, heat, and pressure. Light and dark garments, in particular, require distinct approaches to achieve vibrant colors, sharp detail, durability, and cost efficiency.
This comprehensive guide explains how DTG printer settings should be optimized for light and dark garments, why those differences matter, and how you can improve print quality while reducing ink waste and production errors. Whether you are printing cotton t-shirts, blended fabrics, or specialty garments, understanding these fundamentals will help you unlock the full potential of your DTG printer.
Understanding DTG Printing Technology
Before diving into settings optimization, it is important to understand how DTG printing works.
DTG printing uses specialized water-based textile inks that are jetted directly onto the surface of a garment. Unlike screen printing, which relies on stencils and manual ink application, DTG printers operate similarly to inkjet printers but are engineered to handle fabric textures and absorbency.
The printer sprays ink directly into the fibers, where it bonds through heat curing. Because fabric color affects how ink appears, print settings must be adjusted based on garment shade, fabric composition, and design complexity.
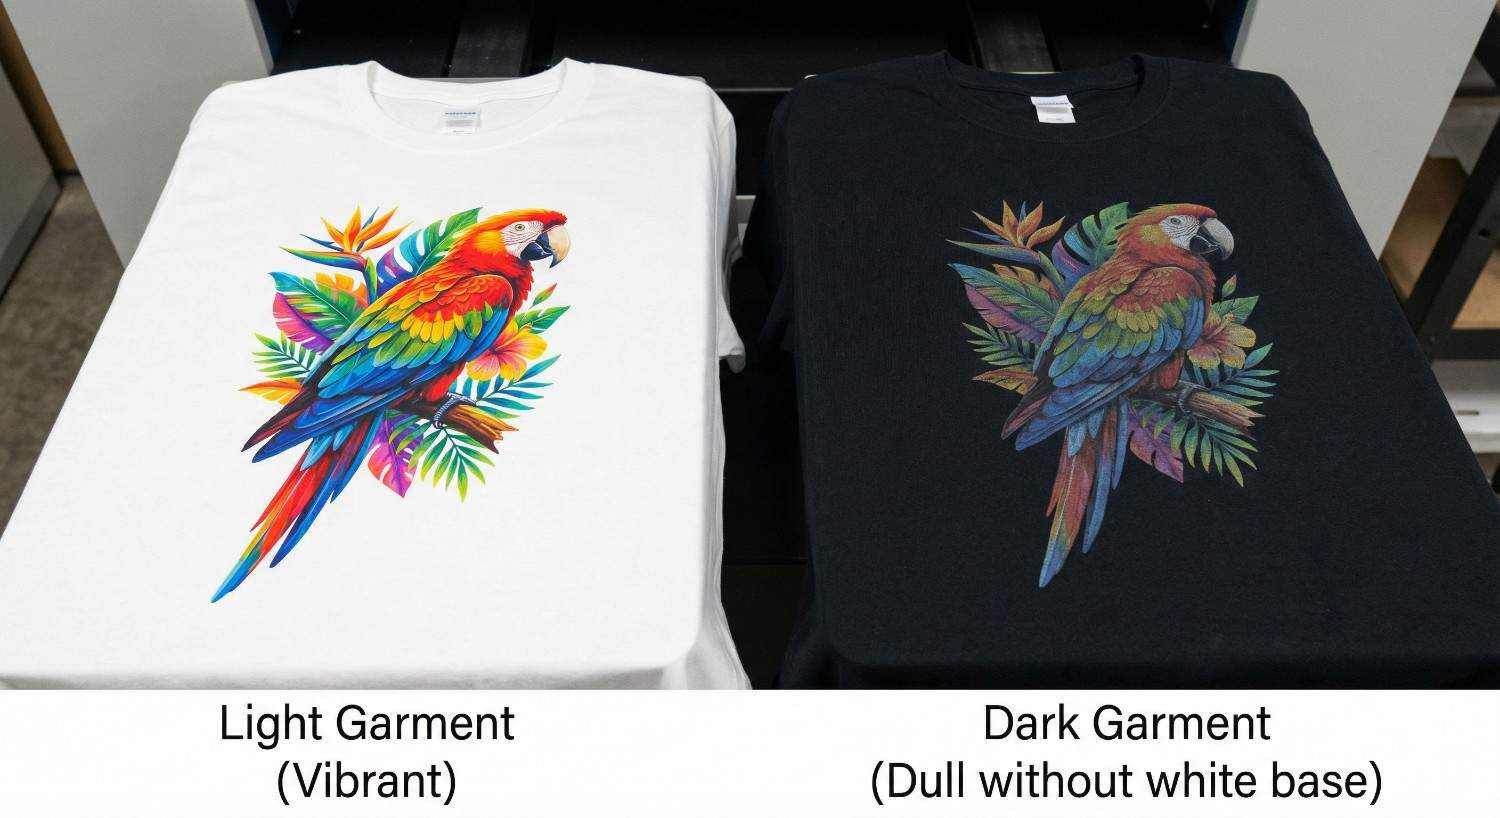
Light garments allow inks to sit naturally on the surface, while dark garments absorb and mute colors unless a white base layer is applied. This fundamental difference drives nearly every setting adjustment in DTG printing.
Why Garment Color Matters in DTG Printing
Garment color directly impacts how ink behaves after printing and curing. If settings are not adjusted properly, you may encounter issues such as:
Dull or faded colors
Ink bleeding or spreading
Cracking after washing
Excessive ink consumption
Poor adhesion and durability
Light garments reflect light, enhancing ink brightness. Dark garments absorb light, reducing color visibility unless compensated with a white ink underbase. Therefore, light and dark garments must never be treated as the same during printing.
Printing on Light Garments: Key Characteristics
Light-colored garments typically include white, pastel shades, light gray, beige, and soft tones. These fabrics provide an ideal background for DTG inks.
Advantages of Light Garments
No white underbase required in most cases
Lower ink consumption
Faster print speeds
Minimal pre-treatment needs
Softer hand feel
Because the garment itself acts as a natural background, colors appear more vibrant with less ink.
Printing on Dark Garments: Key Characteristics
Dark garments include black, navy, maroon, dark green, charcoal, and other deep shades. These fabrics require more preparation and precise settings.
Challenges of Dark Garments
Mandatory white ink underbase
Pre-treatment required for ink adhesion
Higher ink consumption
Increased production time
Greater risk of curing and wash durability issues
Despite the challenges, dark garments are extremely popular in fashion and branding, making proper optimization essential for profitability.
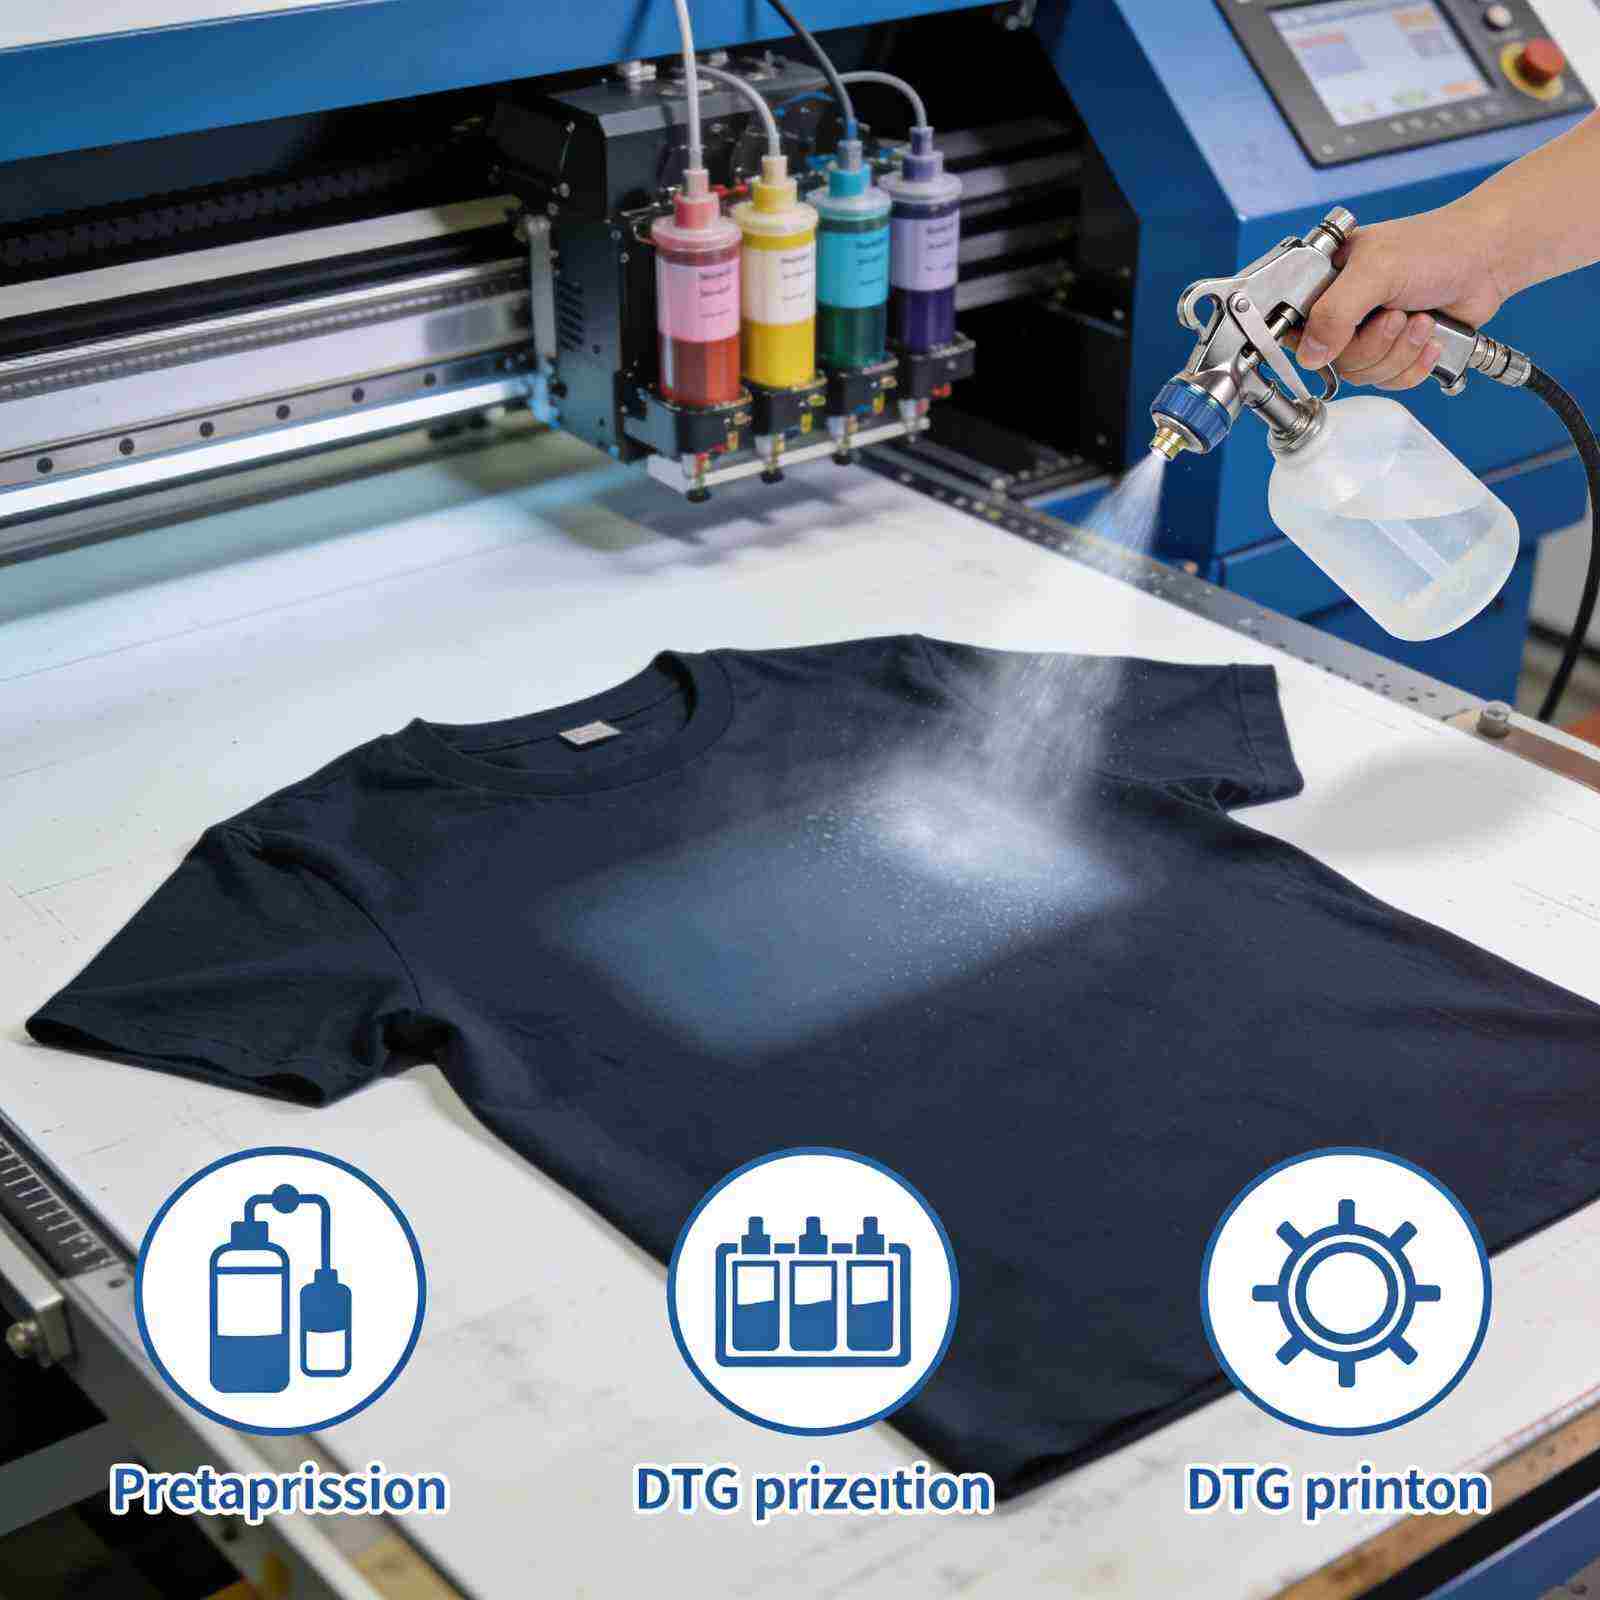
Pre-Treatment: The Foundation of Quality DTG Prints
What Is Pre-Treatment?
Pre-treatment is a chemical solution applied to garments before printing. Its purpose is to help white ink sit on the surface of the fabric instead of soaking into the fibers.
Pre-Treatment for Dark Garments
Dark garments require pre-treatment when printing white ink. Without it, white ink will:
Appear gray or transparent
Bleed into the fabric
Crack or wash out easily
Pre-treatment ensures crisp edges, bright opacity, and long-lasting prints.
Pre-Treatment for Light Garments
In most cases, light garments do not require pre-treatment unless:
The design includes white ink
The fabric is highly absorbent
You want enhanced color sharpness
Skipping unnecessary pre-treatment saves time and reduces chemical use.
Best Practices for Pre-Treatment
Apply evenly to avoid stains or box marks
Use heat press or dryer to properly cure the solution
Adjust pre-treatment amount based on fabric thickness
Always test before full production
White Ink Underbase Explained
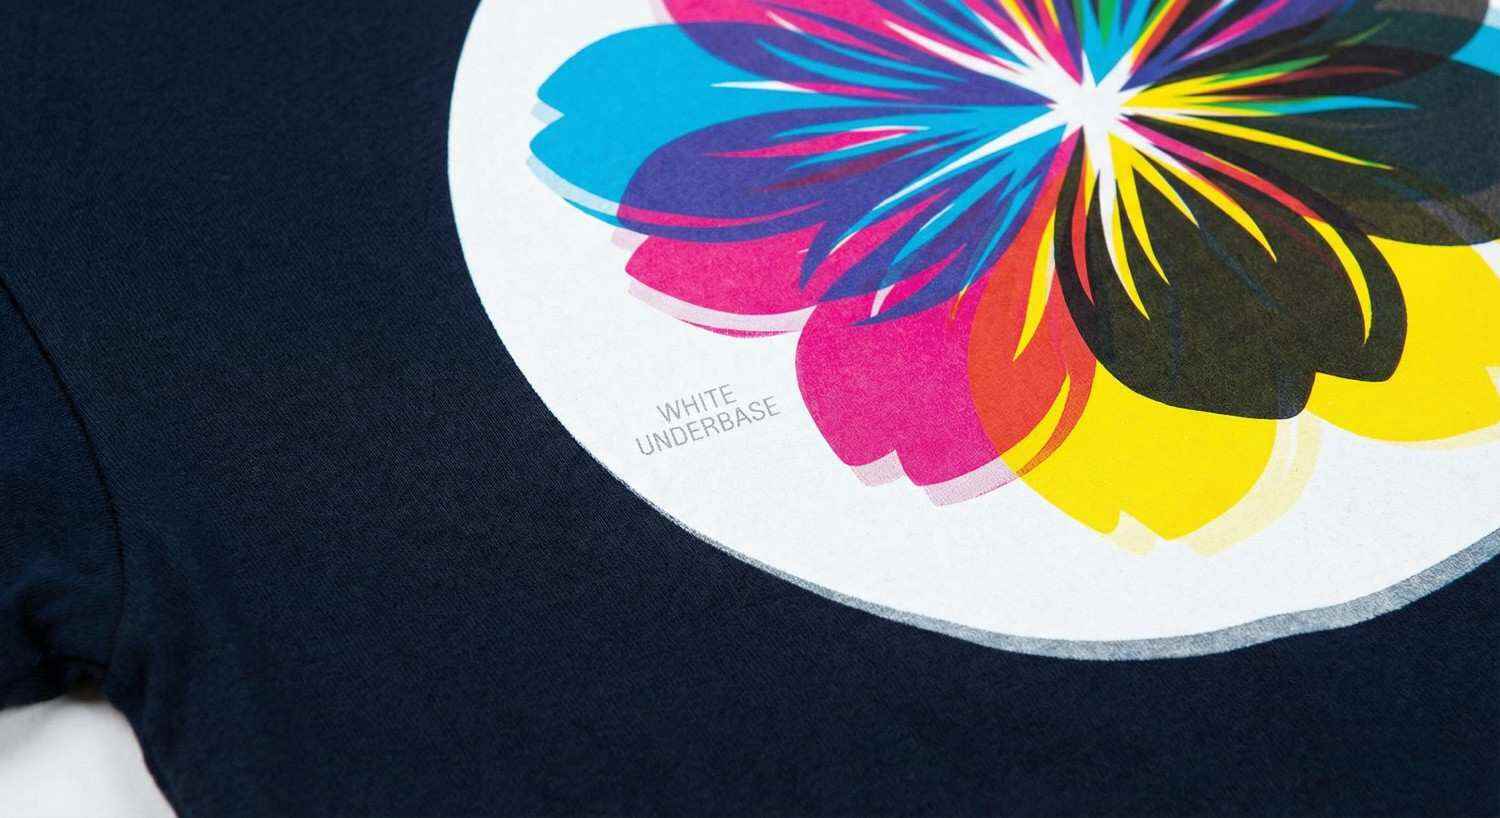
What Is an Underbase?
An underbase is a solid or semi-solid layer of white ink printed beneath the colored design. It acts as a primer, allowing colors to appear vivid on dark fabrics.
When Is an Underbase Required?
Mandatory for dark garments
Optional for light garments (only if white ink is part of the design)
Underbase Thickness and Opacity
Too little white ink results in dull colors. Too much leads to stiffness, cracking, and ink buildup. Proper underbase balance is crucial.
Underbase Optimization Tips
Use choke or spread settings to prevent white ink outlines
Adjust opacity based on garment darkness
Reduce white ink where colors are already bright
Ink Consumption Differences Between Light and Dark Garments
Ink usage is one of the biggest operational costs in DTG printing.
Light Garments
Lower total ink usage
No white ink in most cases
Faster drying and curing
Lower cost per print
Dark Garments
High white ink consumption
Additional color ink layering
Increased curing time
Higher cost per print
Optimizing ink limits and print resolution can significantly reduce waste without sacrificing quality.
Optimizing Print Settings for Light Garments
Print Mode Selection
Use print modes designed for CMYK-only printing. These modes skip the white ink layer entirely, improving speed and efficiency.
Print Resolution (DPI)
300 DPI: Standard designs and bulk orders
600 DPI: High-detail artwork and photographs
Higher DPI increases detail but also ink usage. Choose wisely based on design needs.
Ink Limit Settings
Lower ink limits prevent oversaturation and fabric bleeding. Light garments rarely need maximum ink density.
Color Management
Accurate ICC profiles ensure colors match expectations. Regular calibration improves consistency across batches.
Optimizing Print Settings for Dark Garments
Print Mode Configuration
Select a mode that prints:
White underbase
Flash or delay (if available)
CMYK color layers
This sequence ensures proper color layering and adhesion.
White Ink Density
Set white ink opacity high enough to block garment color but not so high that it causes cracking.
Ink Limit Control
Dark garments benefit from fine-tuned ink limits to avoid thick prints and curing issues.
Print Speed Adjustments
Slower speeds allow better ink placement and reduce banding, especially in detailed artwork.
Fabric Types and Their Impact on DTG Settings
100% Cotton
Ideal for DTG printing
Excellent ink absorption
Predictable results
Cotton-Poly Blends
Require careful temperature control
Ink may sit differently on synthetic fibers
Polyester and Performance Fabrics
Not always DTG-friendly
Risk of dye migration
Specialized inks and settings needed
Always test fabrics before full production.
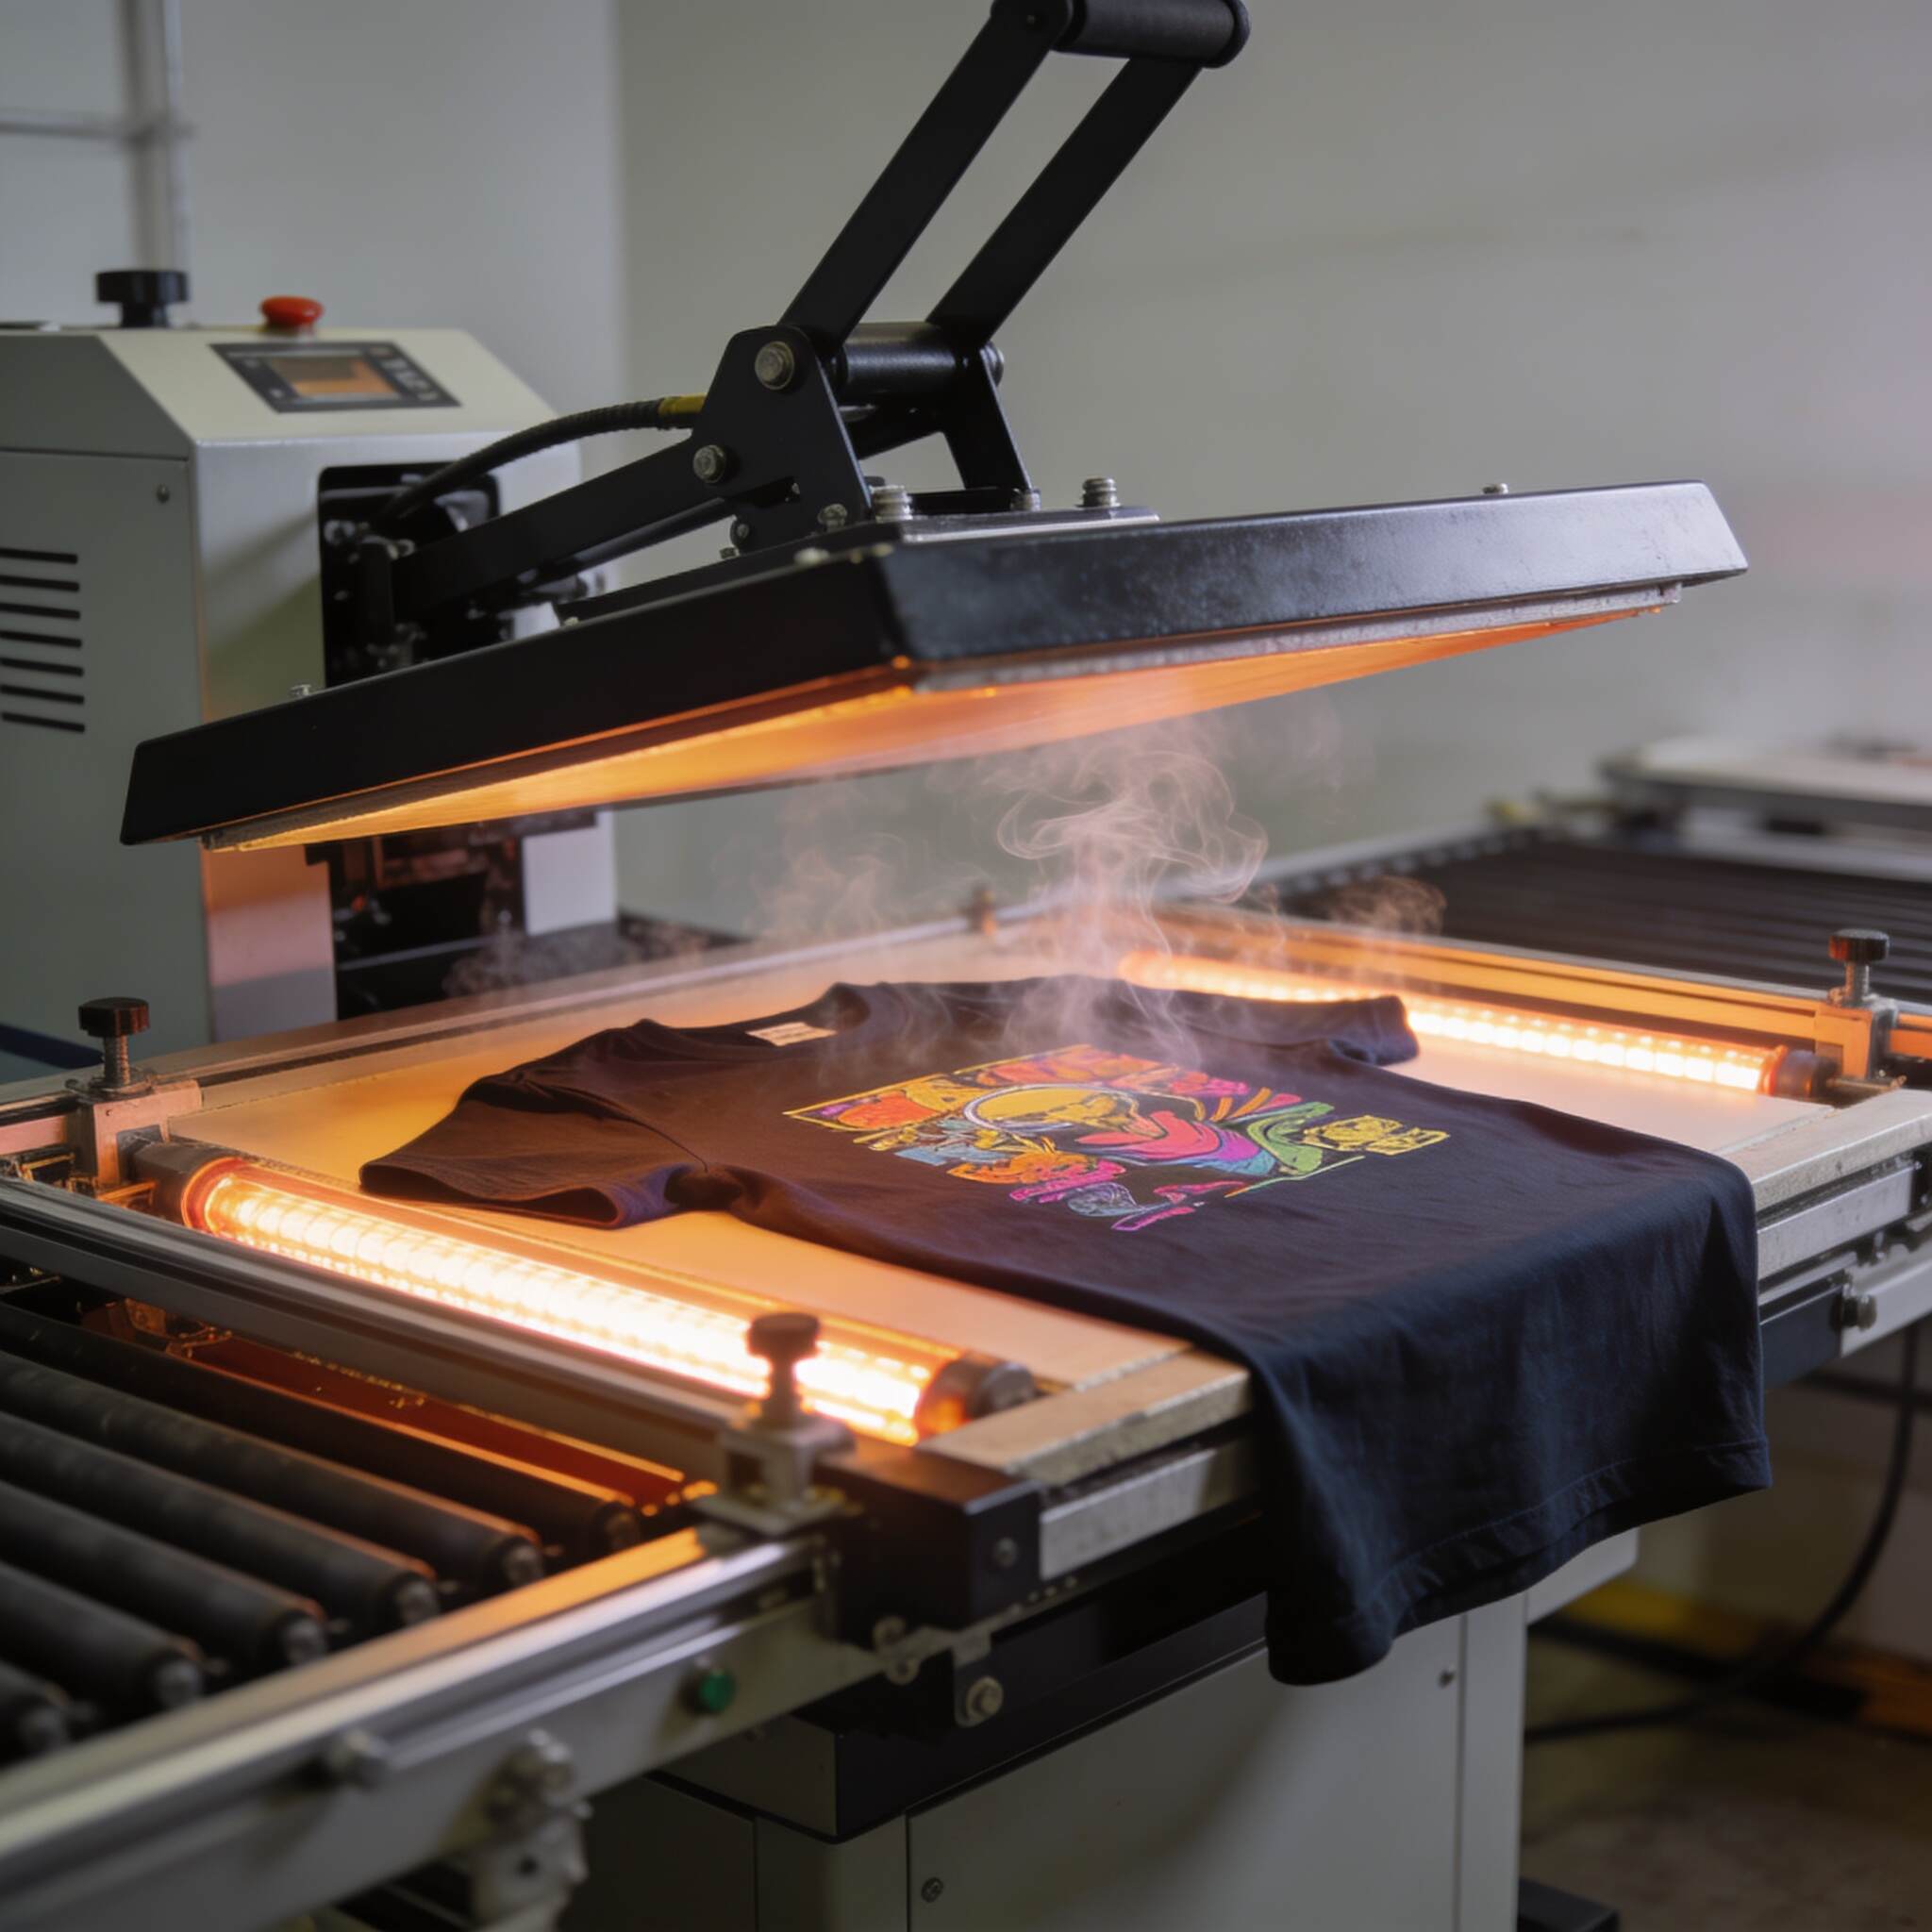
Heat Curing and Its Role in Print Durability
After printing, garments must be cured using a heat press or conveyor dryer.
Proper Curing Ensures:
Ink durability
Wash resistance
Color stability
Common Curing Mistakes
Under-curing leads to wash-out
Over-curing causes cracking and fading
Follow ink manufacturer guidelines for temperature and time.
Routine Maintenance for Consistent Print Quality
Daily Maintenance
Nozzle checks
Print head cleaning
White ink circulation
Weekly Maintenance
Wiper and capping station cleaning
Ink line inspection
Long-Term Care
Firmware updates
Calibration checks
Environment control (humidity and temperature)
Well-maintained printers deliver consistent, high-quality results.
Cost Benefits of Optimized DTG Settings
Proper optimization delivers measurable financial benefits:
Reduced ink consumption
Lower rejection rates
Faster production times
Improved customer satisfaction
Increased profit margins
Even small setting adjustments can lead to significant savings over time.
Common DTG Printing Mistakes to Avoid
Using the same settings for all garments
Skipping pre-treatment on dark fabrics
Overloading white ink
Ignoring fabric differences
Neglecting maintenance
Avoiding these mistakes protects both your printer and your brand reputation.
Scaling Production with Optimized DTG Workflows
As order volume increases, consistency becomes more important than speed. Standardized profiles for light and dark garments help:
Train staff easily
Reduce errors
Maintain brand consistency
Document your best-performing settings and update them as technology evolves.
Future Trends in DTG Printing
DTG technology continues to advance with:
Improved white ink formulations
Faster print speeds
Automated pre-treatment systems
Hybrid DTG and DTF solutions
Staying informed ensures long-term competitiveness in the apparel market.
Conclusion
DTG printing is both an art and a science. While the printer does the physical work, success depends on how well you understand and optimize its settings. Light and dark garments demand different approaches, from pre-treatment and underbase management to ink limits and curing techniques.
By mastering these adjustments, you can achieve brighter colors, sharper detail, better durability, and improved cost efficiency. Ultimately, the key to successful DTG printing is not just owning advanced equipment, but continuously learning, testing, and refining your process.Explore our high-quality DTG printers here
Frequently Asked Questions (FAQs)
Why is white ink necessary for dark garments?
White ink acts as a base layer that blocks the garment’s dark color, allowing printed colors to appear bright and accurate.
Do light garments always require pre-treatment?
No. Most light garments do not require pre-treatment unless white ink is used or the fabric is unusually absorbent.
Can I use the same DTG settings for all garments?
No. Fabric type and color significantly affect ink behavior. Separate profiles should be used for light and dark garments.
How can I reduce ink costs in DTG printing?
Optimize ink limits, choose appropriate resolution, avoid unnecessary white ink, and maintain your printer regularly.
What fabric works best with DTG printers?
100% cotton provides the most reliable and vibrant DTG printing results.