UV DTF Ink Curing Essentials

UV Direct to Film (UV DTF) printing has rapidly become one of the most reliable and versatile printing technologies in the digital printing industry. From customized products and promotional items to signage and decorative applications, UV DTF printing offers sharp details, vibrant colors, and exceptional durability. However, one critical factor determines whether a UV DTF print succeeds or fails—proper ink curing.
Ink curing is not just a finishing step; it is the foundation of print quality, adhesion, and longevity. Even with high-end printers and premium inks, improper curing can lead to dull colors, peeling designs, surface cracking, or premature fading. On the other hand, correctly cured UV DTF prints deliver professional results that withstand handling, moisture, and daily wear.
This article provides a complete, up-to-date guide on UV DTF ink curing. You’ll learn how curing works, why it matters, the key variables that affect it, best practices for consistent results, common mistakes to avoid, and advanced tips used by professional print shops. Whether you are new to UV DTF printing or looking to refine your workflow, this guide will help you achieve reliable, high-quality outcomes.
What Is UV DTF Printing?

UV DTF printing is a modern digital printing process where UV-curable inks are printed onto a special transfer film instead of directly onto the final product. After printing, the design is transferred from the film to the target surface using pressure, making it suitable for a wide range of materials.
Unlike traditional printing methods, UV DTF does not require heat pressing on most surfaces and works well on rigid, curved, or uneven objects. The ink is instantly cured using ultraviolet light, which turns the liquid ink into a solid layer almost immediately.
This process offers several advantages:
High-resolution output with sharp edges
Excellent color vibrancy
Strong adhesion to various substrates
Scratch and water resistance
Fast production speeds
However, all these benefits depend heavily on one element—how effectively the ink is cured.
Understanding UV Ink Curing
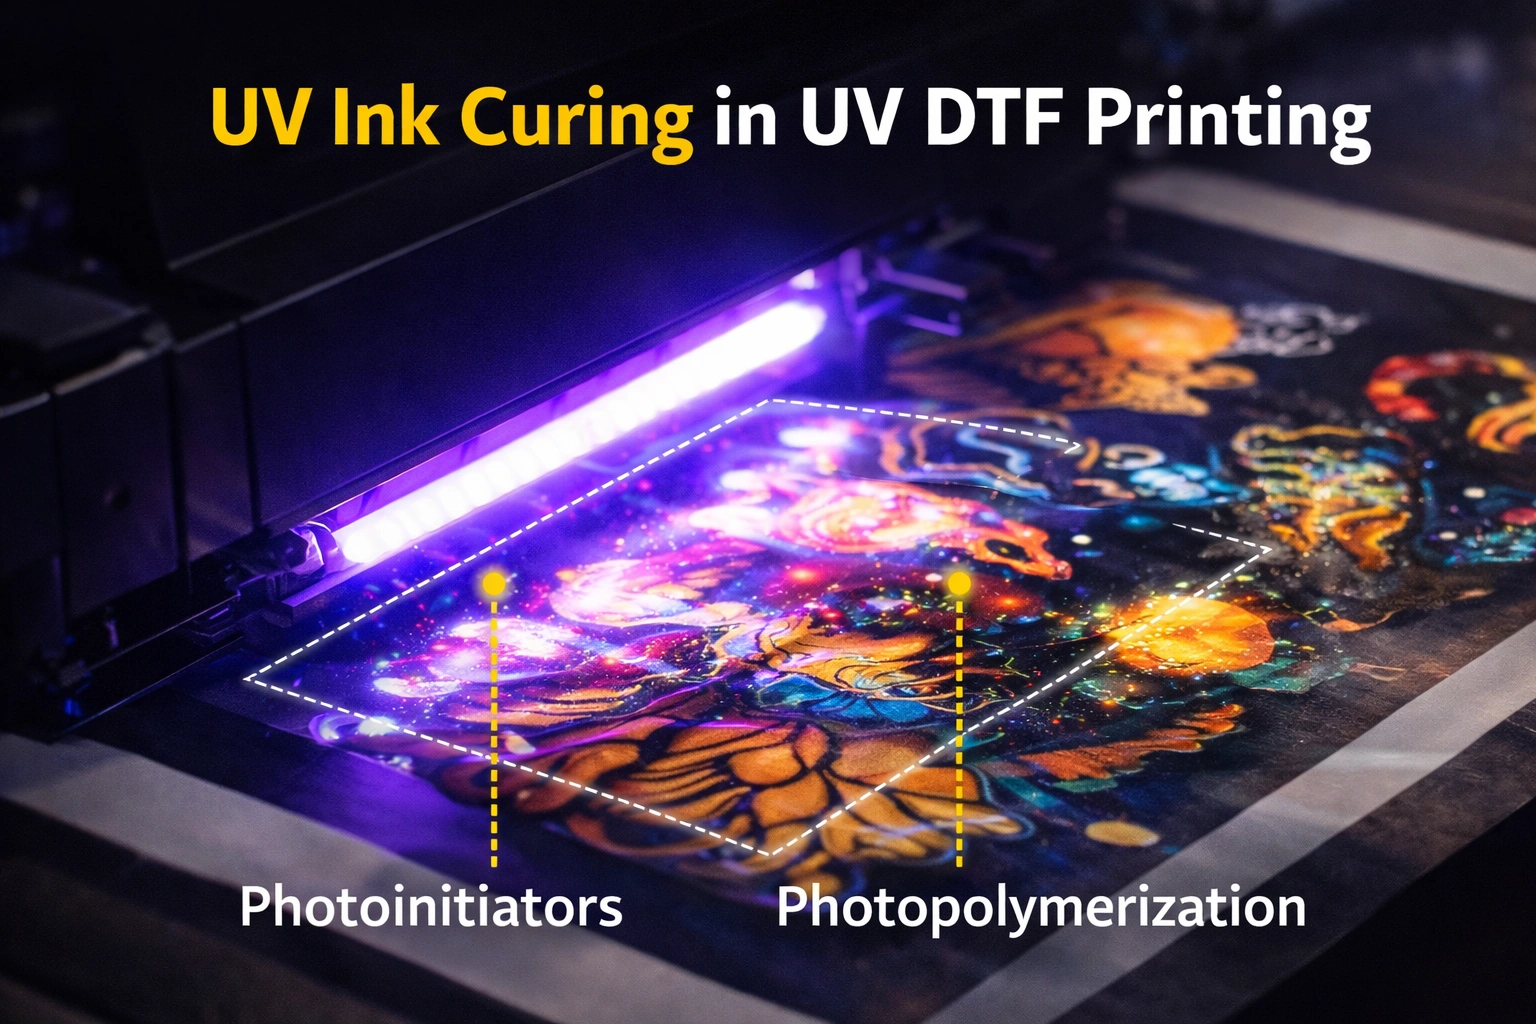
UV ink curing is a chemical process rather than simple drying. Traditional inks dry through evaporation, but UV inks harden through photopolymerization. When exposed to UV light, the ink’s photoinitiators react and instantly transform the ink into a solid, durable layer.
If the curing process is incomplete or uneven, the ink may look dry on the surface but remain soft underneath. This hidden weakness can cause long-term quality issues, especially during transfer, handling, or real-world use.
Effective UV curing ensures:
Complete hardening of ink layers
Proper bonding between ink and film
Smooth surface finish
Resistance to scratches and chemicals
Why Proper Ink Curing Is Critical
1. Long-Term Durability
Well-cured UV DTF prints resist abrasion, water exposure, and environmental stress. Poor curing often leads to cracking, peeling, or premature wear.
2. Strong Adhesion
Curing allows ink to chemically bond with the transfer film and later with the final substrate. Insufficient curing weakens this bond.
3. Color Accuracy and Vibrancy
Correct curing locks in pigments, producing bright and consistent colors. Over-curing or under-curing can distort color tones.
4. Smooth Transfers
When ink is properly cured, transfers release cleanly from the film without stretching or breaking.
5. Faster Production
Correct curing reduces rework, rejects, and post-print delays, improving workflow efficiency.
Key Factors That Affect UV DTF Ink Curing
UV Light Intensity
UV intensity determines how much energy reaches the ink. Low intensity may result in incomplete curing, while excessive intensity can cause brittleness or surface cracking.
Exposure Time
Ink must receive enough UV exposure to cure fully. Faster print speeds reduce exposure time and may require higher UV power.
Distance From UV Source
The closer the ink is to the UV lamp, the stronger the curing effect. Incorrect distance can cause uneven curing across the print.
Ink Layer Thickness
Thicker ink layers require more curing energy. Heavy ink deposits may appear cured on top but remain soft underneath.
Film Quality
Low-quality or incompatible films can interfere with curing efficiency and adhesion.
Environmental Conditions
Temperature, humidity, and airflow directly influence curing stability and consistency.
Best Practices for Effective UV DTF Ink Curing
Optimize UV Lamp Settings
Always use UV lamp settings recommended by the printer or ink manufacturer. Regular calibration ensures consistent energy output across all prints.
Balance Print Speed and Curing Power
Higher print speeds reduce exposure time. Adjust UV power accordingly to maintain proper curing without slowing productivity.
Use Controlled Ink Coverage
Avoid excessive ink layering. Balanced ink density ensures easier curing and smoother transfers.
Choose Compatible Materials
Ensure your inks, films, and substrates are designed to work together. Incompatibility often causes curing failures.
Maintain a Stable Print Environment
Keep temperature and humidity within recommended ranges. Excess humidity can interfere with ink chemistry.
Allow Post-Curing Stabilization
Even after UV exposure, allow prints to rest briefly to stabilize before transfer or packaging.
Common UV DTF Curing Problems and Solutions
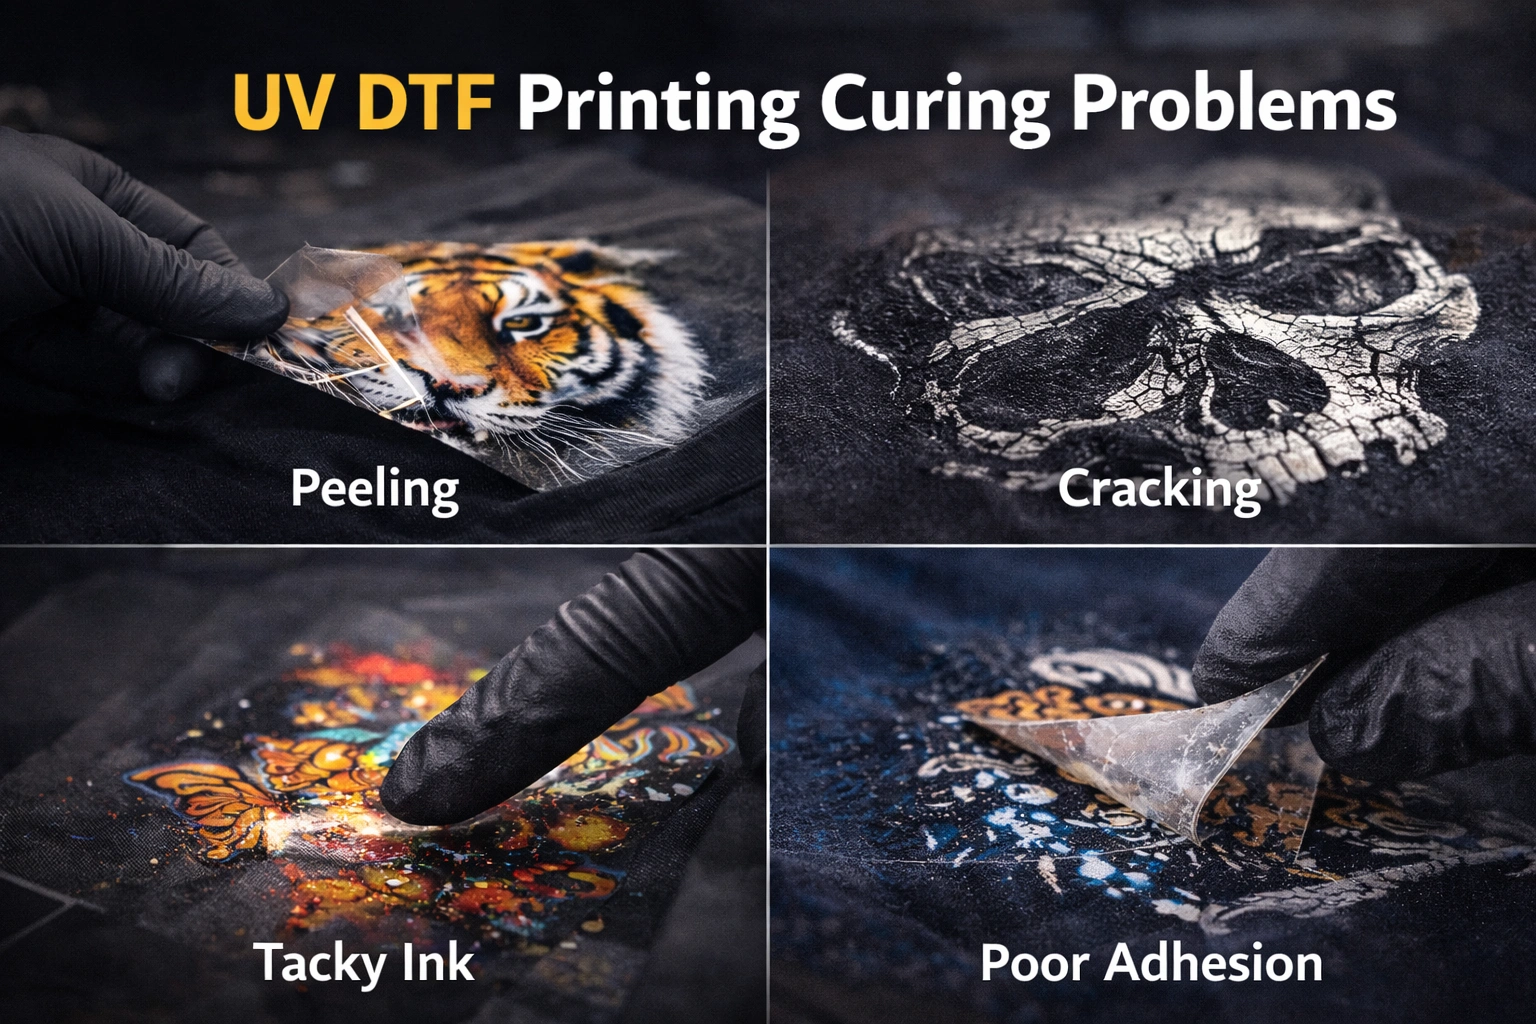
Ink Feels Sticky or Soft
Cause: Insufficient UV exposure
Solution: Increase UV intensity, slow print speed, or reduce ink thickness
Cracking or Brittleness
Cause: Over-curing
Solution: Lower UV intensity or reduce exposure time
Poor Adhesion After Transfer
Cause: Incomplete curing or contaminated surface
Solution: Improve surface cleaning and adjust curing parameters
Dull or Faded Colors
Cause: Under-curing or poor ink quality
Solution: Increase curing energy and use high-quality UV inks
Uneven Finish
Cause: Incorrect lamp distance or inconsistent UV output
Solution: Recalibrate lamp alignment and maintain equipment regularly
Environmental Control for Consistent Curing
Temperature Management
Ideal printing temperatures typically range between moderate room conditions. Extreme cold or heat affects ink flow and curing behavior.
Humidity Control
High humidity slows curing and affects adhesion. Maintain humidity levels around 40–60% for best results.
Ventilation
Good airflow prevents heat buildup and removes ozone generated during UV curing, protecting both prints and equipment.
Post-Printing Handling and Storage
Even perfectly cured prints can fail if mishandled. Always:
Avoid stacking prints immediately after curing
Store films flat and dust-free
Keep prints away from direct sunlight before transfer
Use protective sleeves or covers for storage
Proper handling preserves print integrity and prevents surface damage.
Advanced Tips for Professional Results
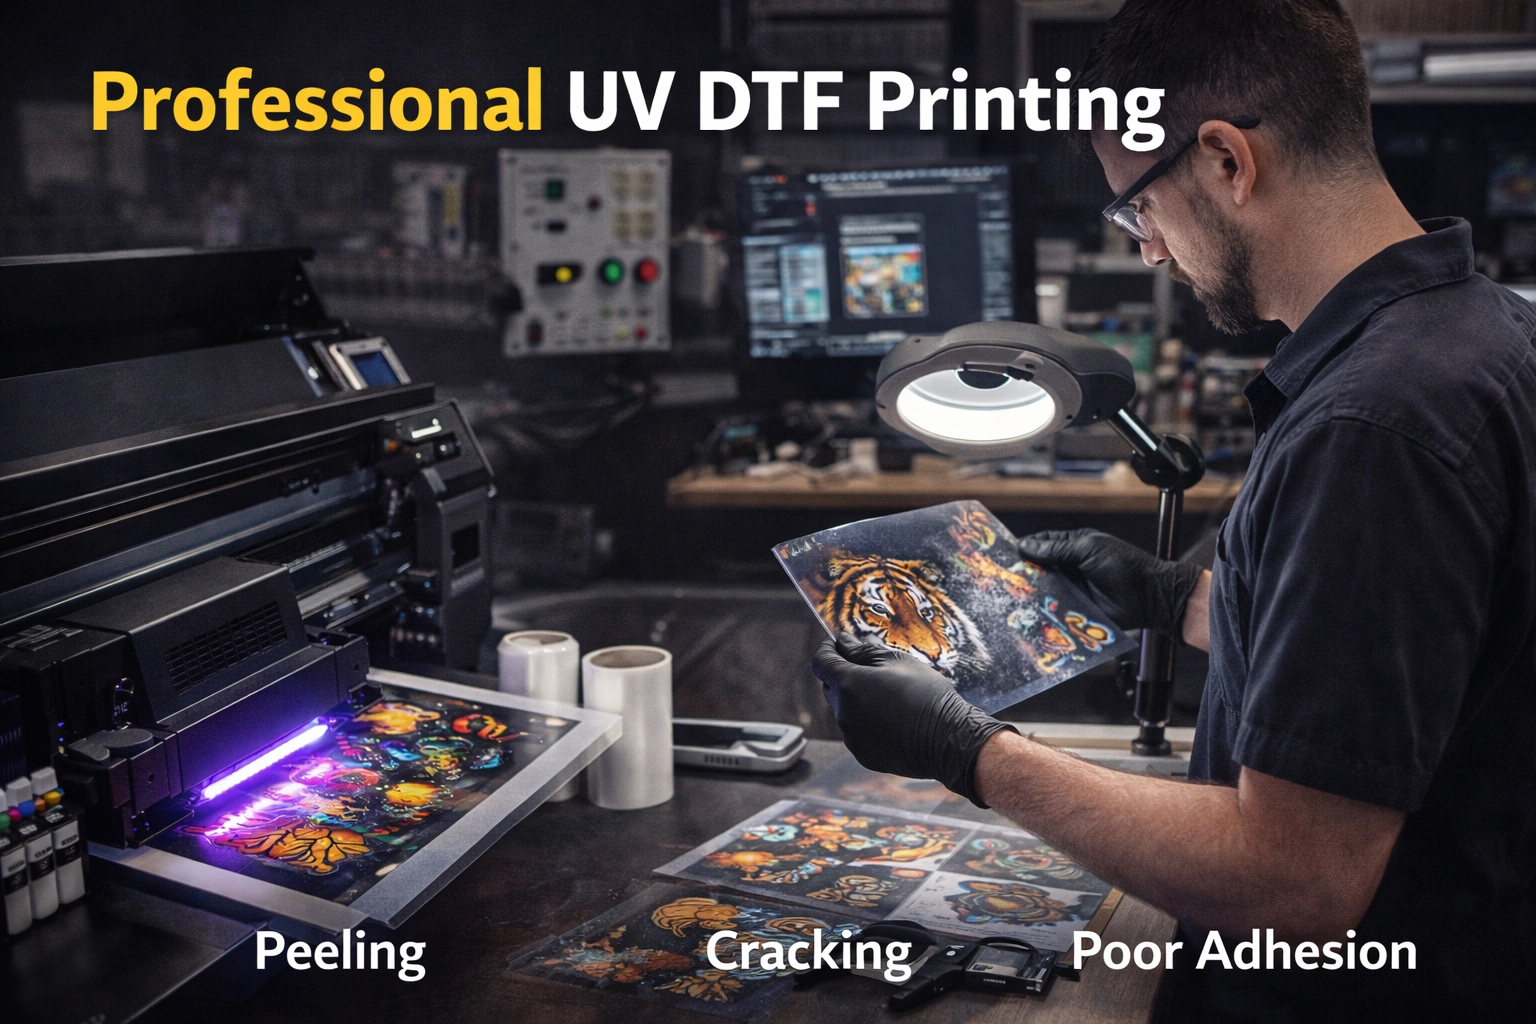
Perform regular curing test strips when changing materials
Log curing settings for different substrates
Replace aging UV lamps before output weakens
Clean reflectors and lamp covers regularly
Avoid mixing incompatible ink brands
Professional shops treat curing as a controlled process, not a guesswork step.
Quality Control Checklist
Before final delivery, confirm:
Ink surface is fully dry and firm
No tackiness or odor remains
Colors appear vibrant and consistent
Transfers release cleanly from film
Final adhesion passes scratch and tape tests
This checklist helps catch issues early and ensures customer satisfaction.
Conclusion
UV DTF printing delivers outstanding results only when ink curing is handled correctly. From UV light exposure and print settings to environmental control and post-print care, every step plays a role in achieving durable, high-quality prints.
By understanding the curing process and applying best practices consistently, you can eliminate common defects, reduce waste, and improve overall production efficiency. Proper curing is not just a technical requirement—it is a competitive advantage.
Mastering UV DTF ink curing allows you to unlock the full potential of your printing setup and deliver results that meet professional standards every time.Explore our high-quality UV-DTF printers here
Frequently Asked Questions
What is the ideal UV curing time for UV DTF ink?
There is no universal time. Curing depends on ink type, UV lamp power, print speed, and material. Testing is essential for optimal results.
Can UV DTF prints be under-cured but still look dry?
Yes. Ink may feel dry on the surface but remain soft underneath, leading to future peeling or cracking.
Does higher UV power always mean better curing?
No. Excessive UV power can cause brittleness and color distortion. Balance is key.
How do I know if ink is fully cured?
Fully cured ink feels firm, non-sticky, odor-free, and passes adhesion and scratch tests.
Can environmental conditions really affect curing?
Absolutely. Temperature and humidity significantly influence ink chemistry and UV reaction efficiency.