

 HOME
HOME PRODUCT CENTER
 ABOUT US
 DOWNLOAD CENTER
 SUPPORT CENTER
 SUBSCRIBE
 BLOG
BLOGHow Printheads, Ink, RIP Software and Curing Work Together in Digital Printing
A reliable digital printer is more than a print engine. Printheads, ink, RIP software, media settings, and curing or drying systems must work together to turn digital artwork into consistent, production-ready output.
This complete digital printing workflow determines how accurately an image is reproduced, how efficiently ink is delivered, how well colors are controlled, and how durable the final print becomes. A printer with an advanced printhead may still produce inconsistent results when the ink, software settings, substrate, or curing process is not properly matched.
Understanding how these components interact helps print shops, manufacturers, distributors, and production teams choose equipment and optimize daily operation.
What Is a Digital Printing Workflow?
A digital printing workflow is the sequence through which an electronic image becomes a finished printed product.
In a typical workflow, the process follows this path:
Artwork → RIP Processing → Printer Settings → Printhead → Ink Deposition → Substrate → Curing or Drying → Finished Output
The process begins with artwork created in design software. The RIP then interprets the file and converts visual information into printable data. Depending on the printing technology, RIP settings may control color management, resolution, print passes, ink density, white-ink layers, image placement, and media configuration.
The processed data is sent to the printer, where the printhead deposits precisely controlled ink droplets onto the selected substrate. The ink then interacts with the surface and is dried, heated, or cured according to the printing technology.
This is why digital printing should be viewed as an integrated system rather than a collection of individual specifications.
For businesses evaluating different technologies, MTuTech’s Printing Technology Guides provide additional information about UV, DTF, textile, and other digital printing applications.
How Printheads Control Ink Deposition
The printhead is responsible for placing microscopic droplets of ink in the correct position. Its performance has a direct effect on image sharpness, gradients, text clarity, color density, and overall consistency.
Different printer configurations use different printhead arrangements according to the intended application. MTuTech’s product range includes UV, DTF, direct-to-fabric, dye-sublimation, eco-solvent, and other digital printing systems designed for different production environments.

For example, the MT-UV 2513Pro is designed for large-format rigid-substrate printing, while the MT-DTF 60Pro II is designed for DTF textile applications.
Several printhead factors influence output quality:
Printhead Factor | Effect on Output |
Nozzle condition | Determines whether ink is deposited consistently |
Droplet control | Influences fine detail and tonal transitions |
Printhead alignment | Affects registration and image sharpness |
Head height | Influences droplet placement and edge definition |
Print mode | Balances quality, speed, and ink consumption |
A nozzle check should therefore be part of routine production preparation. If missing lines or irregular patterns appear, maintenance should be completed before starting a large print job.
How Ink Works with the Printhead
Ink is an active part of the printing system. Its viscosity, flow characteristics, pigment or dye composition, and interaction with the substrate all influence print performance.
The correct ink must be compatible with the printer’s ink delivery system and printhead configuration. It should also match the final application and finishing process.
MTuTech’s digital ink portfolio includes DTF pigment ink, digital textile pigment ink, sublimation ink, disperse ink, reactive ink, acid ink, and UV ink for different printing technologies.
The key ink considerations include:
· Stable viscosity for predictable droplet formation
· Reliable flow through the ink system
· Consistent color density
· Suitable adhesion to the target substrate
· Compatibility with the curing or drying method
· Appropriate performance for the intended application
For example, textile printing requires an ink formulation suited to the fabric and printing process, while UV applications require ink that can be solidified through ultraviolet exposure.
The relationship between ink and printhead becomes especially important when operators change ink types, media, or production modes. A change in one element may require corresponding adjustments elsewhere in the workflow.
Why RIP Software Matters in a Digital Printing Workflow
RIP software acts as the processing layer between artwork and the printer. A RIP software printer workflow is designed to convert digital files into instructions that control how the printer applies ink.
Rather than simply transferring an image, RIP processing can determine important production parameters such as color conversion, resolution, pass count, ink limits, print direction, layout, and special-color layers.
Color Management and Ink Density
Color management determines how colors in the source artwork are translated into the printer’s available ink channels.
Incorrect profiles or ink limits can create excessive saturation, weak color reproduction, blocked shadows, or unnecessary ink consumption. Proper RIP configuration allows operators to balance color accuracy with production efficiency.
White ink introduces another important consideration. In DTF and some other applications, white ink can form a foundation beneath color layers. The RIP determines where that white layer is generated and how its density is controlled.
Resolution, Passes, and Production Speed
RIP software also influences the balance between image quality and productivity.
Higher resolution can improve fine details, but it may increase processing and printing time. Additional print passes can improve smoothness or density while increasing ink consumption.
The best setting is therefore not always the highest setting. The objective is to select a mode that meets the customer’s quality requirements while maintaining practical production speed and material usage.
How Curing and Drying Complete the Process
Once the ink has been deposited, it must be stabilized before the printed product can move to the next stage.
The finishing method depends on the technology.
Printing Technology | Finishing Method | Key Considerations |
UV printing | UV curing | Exposure intensity, curing uniformity, and print speed |
DTF printing | Heat-based powder and ink curing | Temperature, dwell time, and adhesive coverage |
DTG printing | Heat-based drying and curing | Fabric, ink layer, temperature, and time |
Dye sublimation | Heat transfer | Temperature, pressure, and dwell time |
Eco-solvent printing | Evaporative drying | Media compatibility and sufficient drying time |
UV printing provides a clear example of system integration. UV ink is deposited onto the substrate and then exposed to ultraviolet energy so the liquid ink can solidify into a stable printed layer.
MTuTech’s UV Printer range includes solutions with integrated UV LED curing systems. Its product portfolio covers large-format flatbed models, hybrid printers, roll-to-roll systems, and compact UV printers for promotional products and other applications.
Curing must be coordinated with printing speed and ink deposition. If too little curing energy reaches the ink layer, the result may have insufficient hardness or adhesion. Changes in ink volume, pass count, substrate, or machine speed can therefore influence the required finishing conditions.
How the Core Components Work Together
Component | Main Role | Main Variables | Typical Impact on Print Quality |
Printhead | Deposits ink droplets | Nozzle condition, alignment, droplet size | Detail, consistency, sharpness |
Ink | Forms the image | Viscosity, color density, substrate compatibility | Color, adhesion, appearance |
RIP Software | Processes artwork | ICC profile, resolution, passes, ink limits | Color accuracy, efficiency, layering |
Substrate | Receives the ink | Surface, coating, material type | Adhesion and image appearance |
Curing/Drying | Stabilizes the ink | Energy, temperature, time, speed | Durability and finishing quality |
The important lesson is that performance at one stage affects the next. Higher ink density, for example, can increase curing or drying requirements. A change in substrate may require a new media profile. A printhead alignment problem may appear as an image-quality issue even when the RIP settings are correct.
Step-by-Step Guide to Optimizing Your Digital Printing Workflow
Step 1: Prepare the Artwork
Check the original file before it enters production. Confirm image dimensions, resolution, transparency, color space, and final output size.
Poor source artwork cannot be corrected completely through printer settings.
Step 2: Select the Correct Substrate and Media Setting
Choose the appropriate substrate and corresponding media configuration. Different materials absorb, reflect, or accept ink differently, making media selection an important part of color and adhesion control.
Step 3: Configure the RIP
Select the appropriate color profile, resolution, print passes, ink density, and special-layer settings.
For applications using white ink, verify the underbase configuration before production.
Step 4: Inspect the Printhead
Perform a nozzle check before a production run. Look for missing lines, uneven patterns, or other irregularities.
Complete the recommended maintenance process when necessary and confirm alignment before printing valuable materials.
Step 5: Run a Test Print
A small test print provides an early check of color, registration, image detail, ink density, and substrate interaction.
It is much more efficient to correct the workflow on a test piece than after an entire production batch has been printed.
Step 6: Monitor Curing or Drying
Make sure the finishing stage is appropriate for the ink and production speed.
For UV applications, check that the curing system is functioning consistently. For heat-based textile workflows, verify the applicable temperature and dwell-time settings.
Step 7: Inspect the Finished Print
Check color reproduction, surface quality, adhesion, fine details, and overall consistency.
When a problem appears, troubleshoot the workflow systematically instead of changing several variables simultaneously.
A useful diagnostic sequence is:
Finished Print → Curing/Drying → Ink Layer → RIP Settings → Printhead → Media Configuration
This helps operators isolate the actual source of a problem.
Common Problems in a Digital Printing Workflow
Banding or Missing Lines
Banding may be associated with nozzle conditions, printhead alignment, media movement, or unsuitable print-mode settings. Begin with a nozzle check and alignment test.
Colors Are Too Dark or Oversaturated
Check the RIP profile, ink density, color settings, and media configuration. Excessive ink deposition may also influence drying or curing performance.
Poor Adhesion or Smearing
Review the curing or drying stage first, then check ink compatibility and substrate preparation. Excessive ink volume can also affect finishing.
Fine Details Appear Soft
Inspect printhead alignment, head height, resolution, media movement, and source artwork. Increasing resolution alone may not resolve a mechanical or alignment issue.
Inconsistent Results Between Jobs
Check whether the same ink, substrate, media profile, print mode, and finishing settings are being used. Consistency across the entire workflow is essential for repeatable production.
When technical problems persist, MTuTech’s Product Support Center resources can help operators troubleshoot printer operation and maintenance issues.
MTuTech Printing Solutions for Different Applications
A complete printing system should be selected around the application rather than a single specification.
For rigid promotional products, signage, and displays, MTuTech’s UV Printer solutions are designed for direct printing onto suitable substrates.
For customized apparel and textile applications, MTuTech’s DTF Printer solutions provide a workflow for producing transfer graphics efficiently.
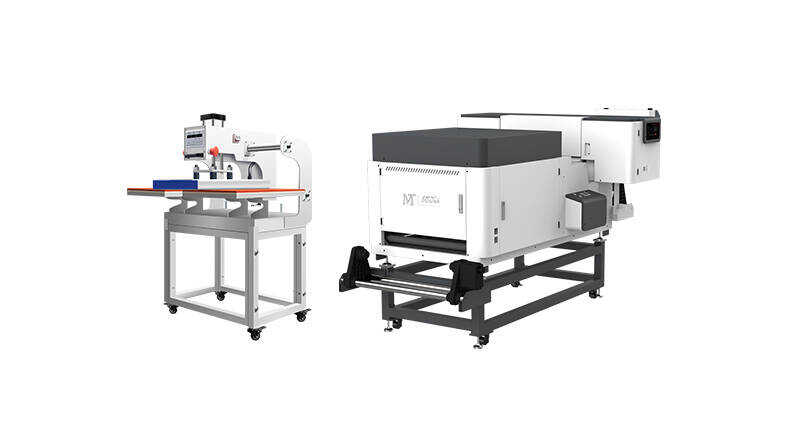
For industrial direct-to-fabric production, the MT-TX 1816 is designed around high-productivity textile printing requirements.
MTuTech also offers dye-sublimation, eco-solvent, roll-to-roll UV, hybrid UV, UV DTF, DTG, and single-pass printing solutions, allowing businesses to build workflows around different materials and production goals.
Conclusion: Treat Digital Printing as One Integrated System
Printheads, ink, RIP software, substrates, and curing systems are not isolated technologies. They form one connected production chain.
The printhead determines how precisely ink is deposited. The ink determines how the image forms and interacts with the surface. RIP software translates artwork into controlled production data. The substrate influences ink behavior and image appearance. Curing or drying determines how the printed layer reaches its final physical state.
A successful digital printing workflow comes from matching these elements rather than optimizing only one of them.
For businesses evaluating a new printer, look beyond headline speed or resolution. Consider printhead configuration, ink compatibility, RIP control, media flexibility, curing technology, maintenance requirements, and technical support as one complete system.
Ready to optimize your digital printing workflow? Connect with MTuTech for guidance on printer configuration, maintenance, ink compatibility, and application requirements.