UV Printing for Floor and Wall Graphics
In today’s highly competitive visual landscape, businesses are constantly looking for impactful ways to capture attention, communicate brand identity, and enhance customer experience. One of the most effective and visually striking solutions is the use of custom floor and wall graphics. From retail stores and shopping malls to corporate offices, hotels, hospitals, and exhibition spaces, these graphics have transformed ordinary surfaces into powerful communication tools.
With the advancement of printing technologies, UV (Ultraviolet) printing has emerged as a game-changer for producing high-quality, durable, and versatile floor and wall graphics. Unlike traditional printing methods, UV printing allows ink to cure instantly, delivering vibrant colors, sharp details, and long-lasting performance on a wide range of materials.
This comprehensive guide explores how to print custom floor and wall graphics using UV printing technology. It covers everything from understanding UV printing and selecting the right materials to the complete printing workflow, finishing techniques, installation tips, and best practices for achieving professional-grade results. Whether you are a print service provider, designer, or business owner, this guide will help you fully leverage UV printing for stunning and durable graphics.
Understanding UV Printing Technology
UV printing is a modern digital printing process that uses ultraviolet light to instantly cure specially formulated inks as they are applied to the substrate. Instead of soaking into the material or evaporating like solvent or water-based inks, UV inks harden immediately when exposed to UV light, forming a solid layer on the surface.
This instant curing process offers several key advantages. The printed image remains sharp without spreading, colors appear richer and more vibrant, and the final output is ready for use immediately after printing. Because the ink sits on the surface rather than being absorbed, UV printing works exceptionally well on non-porous materials such as vinyl, plastic, acrylic, metal, glass, wood, and tiles.
For floor and wall graphics, where durability, clarity, and adhesion are critical, UV printing provides unmatched reliability and visual appeal.
Why UV Printing Is Ideal for Floor and Wall Graphics
Custom floor and wall graphics are exposed to demanding conditions. Floor graphics endure constant foot traffic, cleaning, and friction, while wall graphics must maintain color accuracy and adhesion over extended periods. UV printing addresses these challenges effectively.
One major advantage is exceptional print quality. UV printing produces sharp text, smooth gradients, and vivid colors that enhance brand visibility and aesthetic impact. This is especially important in environments such as retail stores, showrooms, and exhibitions where first impressions matter.
Durability is another key benefit. UV-cured inks create a tough, scratch-resistant surface that withstands wear, moisture, chemicals, and UV exposure. This makes UV-printed graphics suitable for both indoor and outdoor applications.
Versatility also plays a significant role. UV printers can print on a wide range of rigid and flexible substrates, allowing designers and businesses to experiment with textures, finishes, and creative concepts.
Additionally, UV printing is considered environmentally friendly compared to solvent-based printing. UV inks emit minimal volatile organic compounds (VOCs), improving workplace safety and reducing environmental impact.
Applications of UV-Printed Floor and Wall Graphics
UV-printed floor and wall graphics are widely used across industries due to their visual impact and functional benefits.
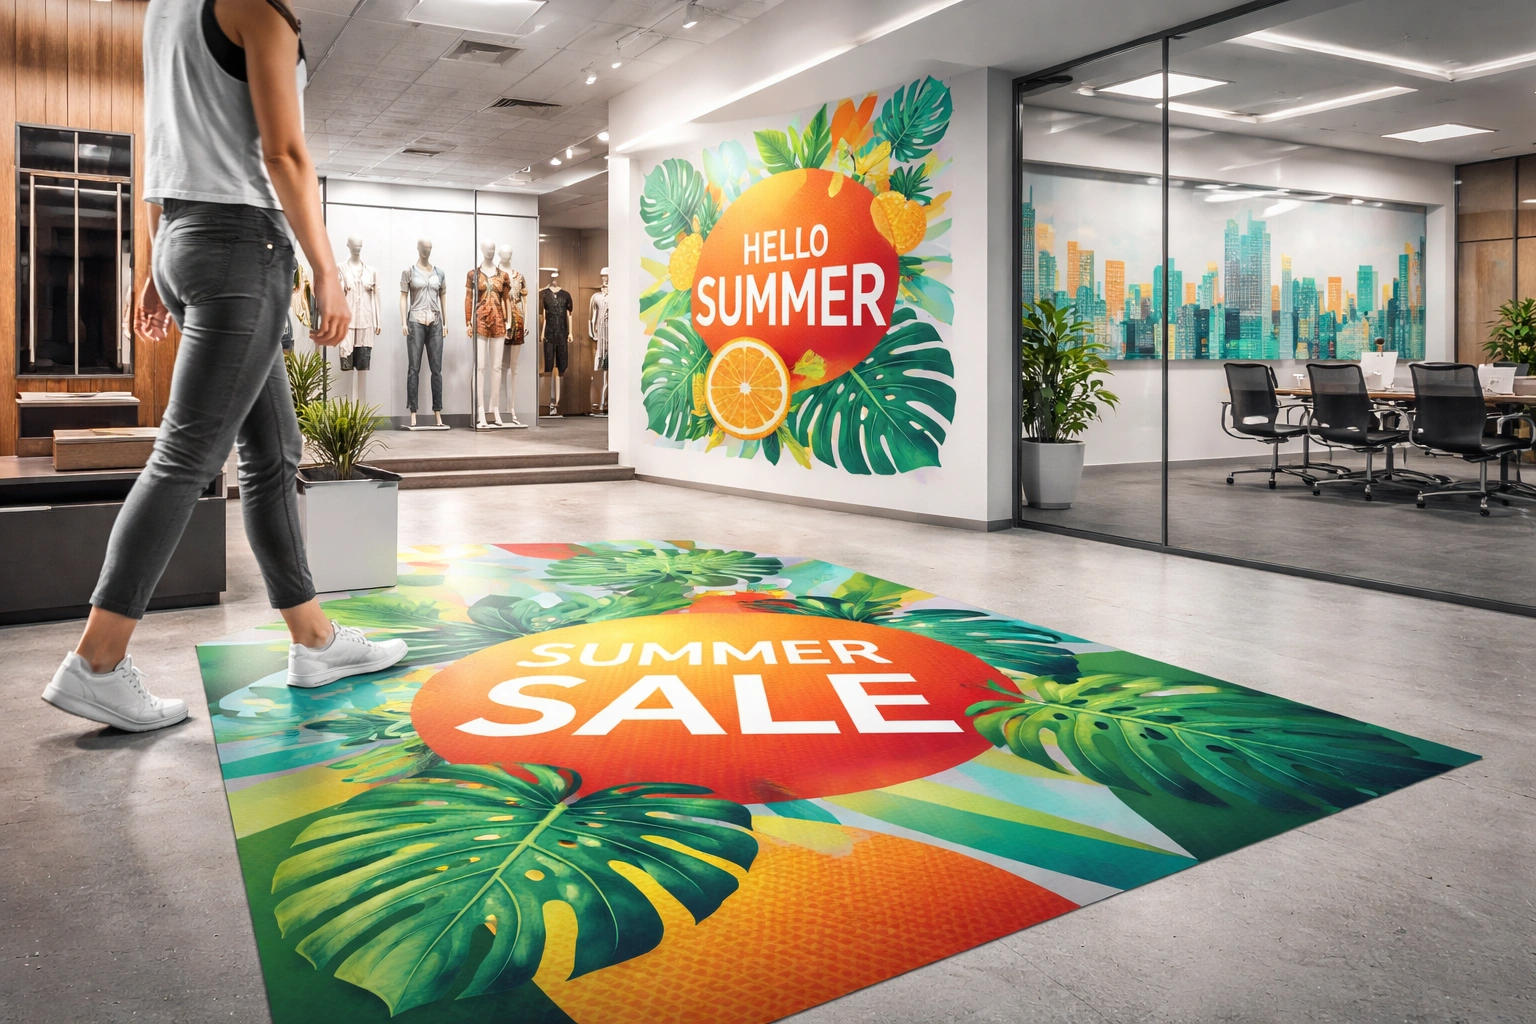
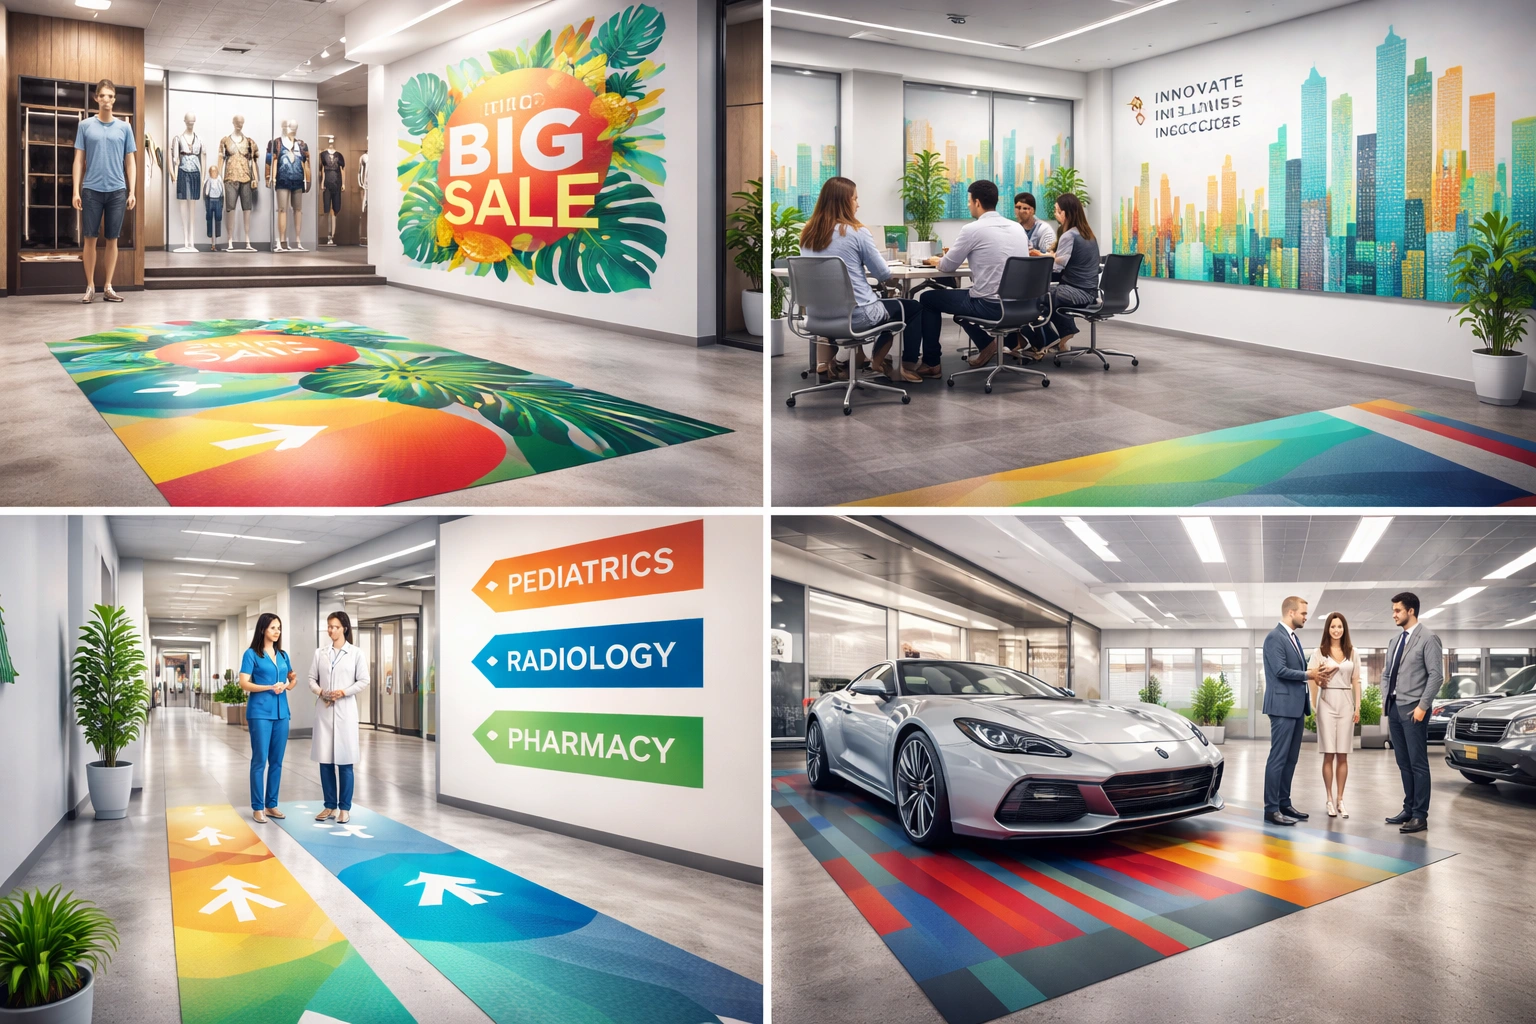
In retail environments, floor graphics guide customers, promote offers, and highlight product zones, while wall graphics reinforce branding and create immersive shopping experiences. In corporate offices, wall graphics communicate company values, timelines, and achievements, enhancing workplace aesthetics and employee engagement.
Hospitals and healthcare facilities use floor graphics for wayfinding and safety instructions, while wall graphics create a calming and welcoming atmosphere. In hospitality settings such as hotels and restaurants, custom graphics elevate interior design and strengthen brand identity.
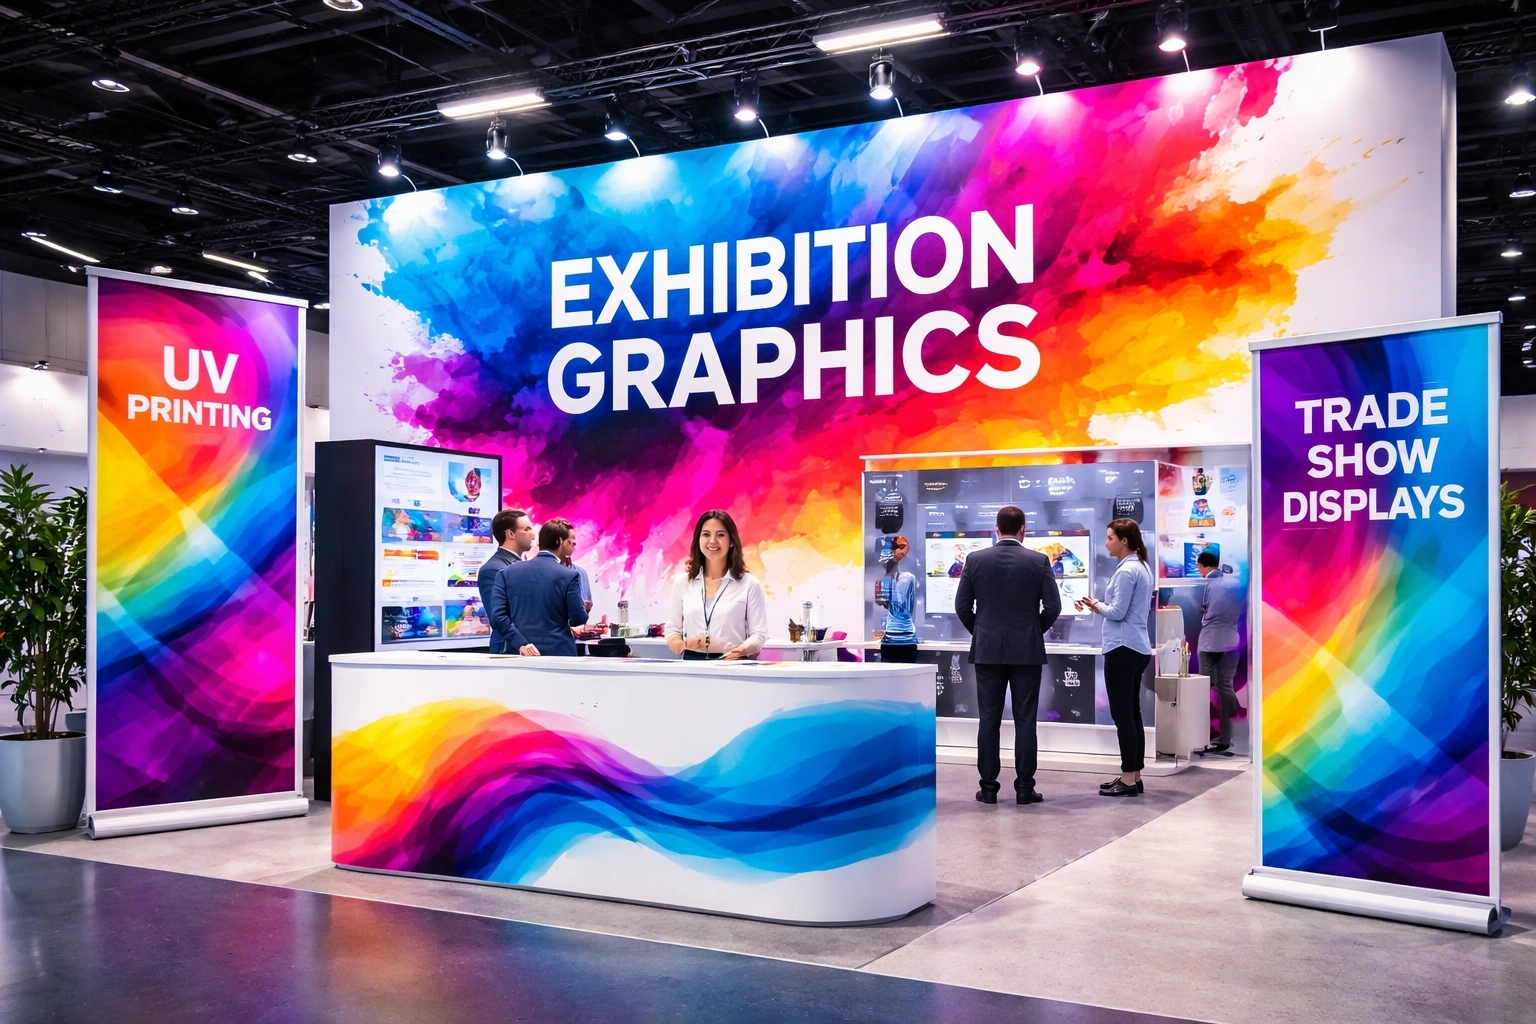
Exhibitions, trade shows, airports, schools, gyms, and entertainment venues also rely heavily on UV-printed graphics to convey information, attract attention, and enhance user experience.
Preparing for UV Printing
Successful UV printing begins with thorough preparation. Proper planning ensures print accuracy, material compatibility, and long-lasting results.
Choosing the Right Design Software
Professional graphic design software is essential for creating high-quality artwork. Software such as Adobe Illustrator, Adobe Photoshop, and CorelDRAW are widely used in the printing industry. These tools support vector and raster graphics, color management, and high-resolution output.
Design files should be created at the final print size to avoid scaling issues. Using CMYK color mode is recommended to achieve accurate color reproduction during printing. Bleed areas and safe margins should also be considered, especially for large floor and wall graphics.
Selecting Suitable Materials
Material selection plays a crucial role in the performance of floor and wall graphics. The substrate must be compatible with UV printing and suitable for the intended environment.
For floor graphics, commonly used materials include textured vinyl, anti-slip vinyl films, and durable polyester films designed to withstand heavy foot traffic. These materials often feature adhesive backing for easy installation.
For wall graphics, options include smooth vinyl, fabric-based wallpapers, PVC sheets, foam boards, and rigid panels. The choice depends on surface type, indoor or outdoor usage, and desired finish.
Ensuring High-Resolution Artwork
High-resolution images are essential for professional results. Artwork should typically be at least 300 DPI at the final print size to maintain sharpness and clarity. Low-resolution images may appear pixelated or blurry, reducing the overall impact of the graphic.
The UV Printing Process Explained
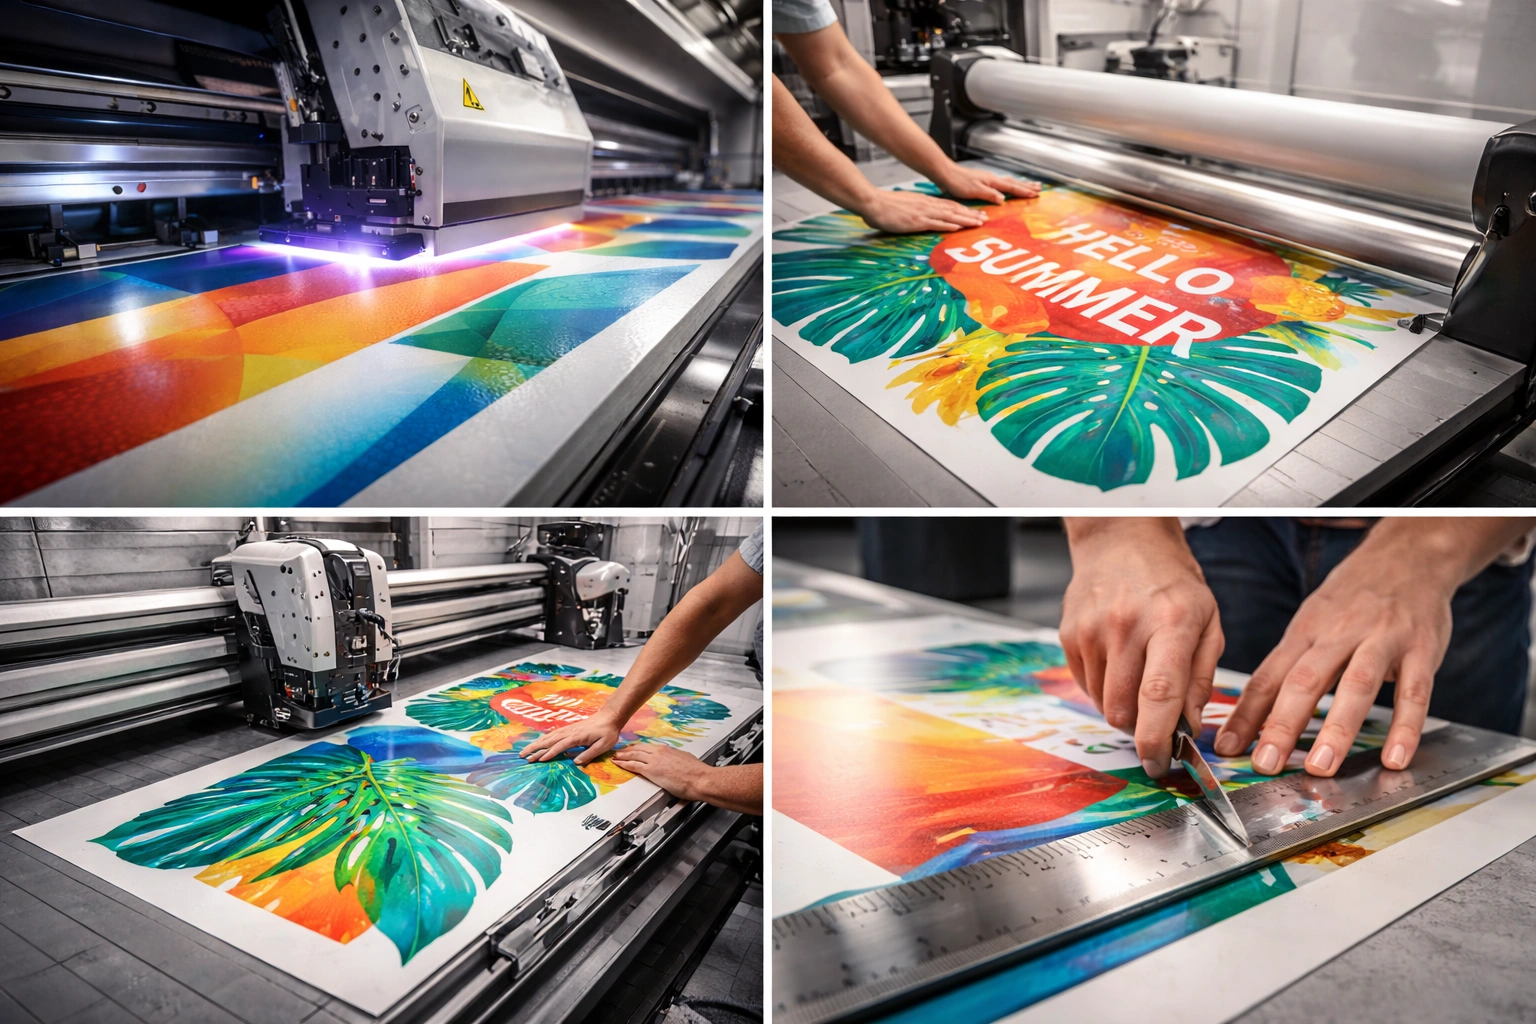
Once the design and materials are ready, the UV printing process can begin.
Setting Up the UV Printer
Proper printer setup is critical for consistent output. The printer should be calibrated according to manufacturer guidelines. Print heads must be clean, ink levels checked, and UV lamps functioning correctly.
Material alignment is equally important. The substrate should be loaded evenly to prevent skewing or misalignment during printing. Printer settings such as print speed, ink density, and curing intensity should be adjusted based on the material and desired quality.
Conducting a Test Print
Before printing the final graphic, a test print is highly recommended. This allows verification of color accuracy, alignment, and overall quality. Test prints help identify potential issues early, reducing material waste and production errors.
Printing the Final Graphics
Once the test print meets expectations, the final printing can proceed. UV printers allow for consistent output even on large-format graphics. During printing, UV lamps cure the ink instantly, ensuring that the printed surface remains clean and smudge-free.
Depending on the printer model, multiple layers of ink can be applied to enhance opacity, texture, or special effects such as spot varnish or raised finishes.
Post-Printing Finishing Techniques
Finishing plays a vital role in extending the lifespan and improving the functionality of floor and wall graphics.
Lamination for Protection
Lamination adds an extra protective layer to printed graphics. For floor graphics, slip-resistant laminates are essential to ensure safety in high-traffic areas. These laminates also protect against scratches, moisture, and wear.
Wall graphics may benefit from clear laminates that enhance durability without compromising visual quality. Matte or gloss laminates can be selected based on aesthetic preference.
Trimming and Cutting
Precise trimming ensures a clean and professional appearance. Excess material should be removed carefully using cutting tools or automated cutting machines. Intricate shapes and custom contours can be achieved with digital cutting systems.
Preparing for Installation
Before installation, the surface must be thoroughly cleaned and dried. Dust, grease, and moisture can affect adhesion and cause bubbles or peeling over time. Proper surface preparation is crucial for long-term performance.
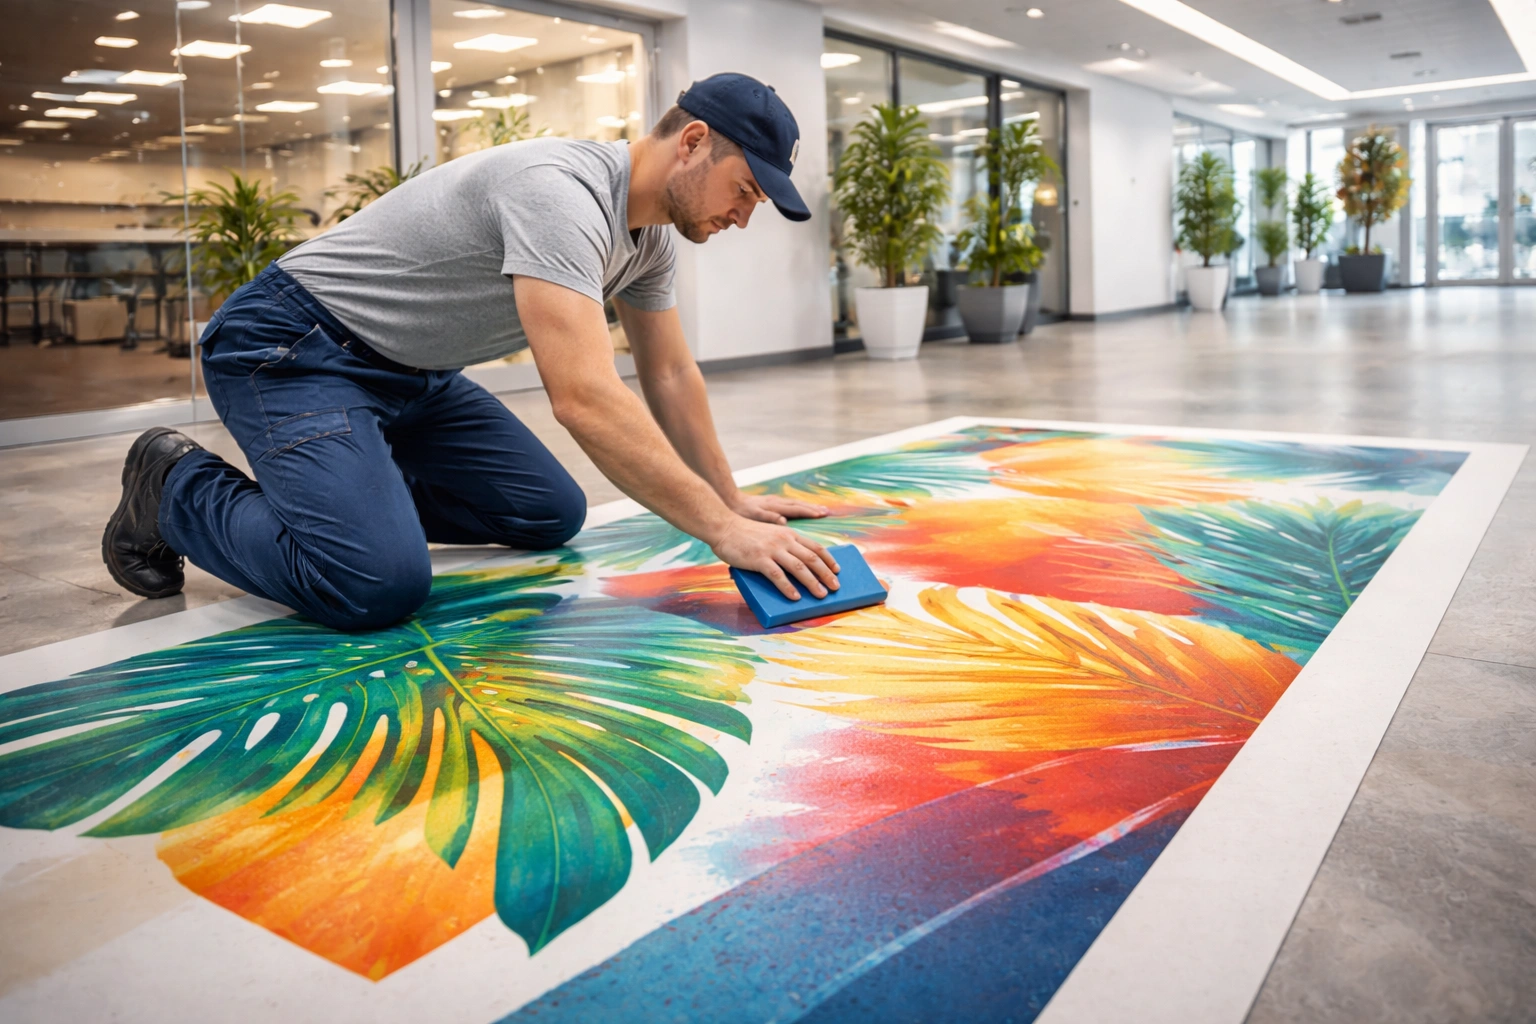
Installing Floor and Wall Graphics
Correct installation techniques ensure that graphics remain intact and visually appealing.
Floor graphics should be applied to smooth, flat surfaces. After positioning, pressure should be applied evenly to activate the adhesive and remove air bubbles. For best results, floor graphics should be installed during low-traffic periods.
Wall graphics should be applied using a squeegee, starting from the center and moving outward. This technique helps prevent wrinkles and bubbles. Careful alignment is especially important for large or multi-panel graphics.
Maintenance and Care Tips
UV-printed floor and wall graphics require minimal maintenance, but proper care extends their lifespan.
Regular cleaning with mild, non-abrasive cleaners helps maintain appearance. Harsh chemicals and abrasive tools should be avoided, especially on floor graphics. Periodic inspection ensures early detection of wear or peeling.
Educating clients or end-users about proper care also helps preserve the quality of the graphics over time.
Common Mistakes to Avoid
Avoiding common mistakes can save time and resources. Using low-resolution artwork, selecting incompatible materials, skipping test prints, or neglecting surface preparation can lead to poor results.
Improper curing settings or insufficient lamination may reduce durability, especially for floor graphics. Consistent quality checks throughout the process help prevent these issues.
Business Benefits of UV-Printed Graphics
From a business perspective, UV-printed floor and wall graphics offer excellent return on investment. Their durability reduces replacement frequency, while their visual impact enhances brand recognition and customer engagement.
UV printing also enables faster production cycles, allowing businesses to meet tight deadlines and handle custom projects efficiently. The ability to print on diverse materials opens new revenue streams and creative opportunities.
Future Trends in UV Printing for Graphics
The future of UV printing continues to evolve with advancements such as LED-UV technology, improved ink formulations, and enhanced automation. These innovations further reduce energy consumption, improve print quality, and expand application possibilities.
As demand for customized, durable, and eco-friendly graphics grows, UV printing will remain at the forefront of large-format printing solutions.
Conclusion
Custom floor and wall graphics printed using UV technology offer a powerful combination of visual impact, durability, and versatility. With instant curing, vibrant colors, and compatibility with a wide range of materials, UV printing has become the preferred choice for high-quality graphic applications.Explore our high-quality UV printers here
By understanding the complete process—from design preparation and material selection to printing, finishing, and installation—businesses and professionals can consistently produce exceptional results. Whether used for branding, decoration, or communication, UV-printed graphics create engaging environments that leave a lasting impression.
Integrating UV printing into your workflow not only enhances creative potential but also strengthens business growth in an increasingly competitive market.
Frequently Asked Questions (FAQ)
What makes UV printing different from traditional printing methods?
UV printing uses ultraviolet light to instantly cure ink, resulting in faster production, sharper images, and compatibility with a wider range of materials compared to traditional printing.
Are UV-printed floor graphics safe for high-traffic areas?
Yes, when combined with slip-resistant laminates, UV-printed floor graphics are safe, durable, and suitable for high-traffic environments.
Can UV-printed wall graphics be removed easily?
Depending on the material and adhesive used, many UV-printed wall graphics can be removed without damaging the surface, especially when designed for temporary installations.
Is UV printing cost-effective in the long run?
Although the initial cost may be higher, UV printing offers long-term savings due to durability, reduced maintenance, and fewer replacements.
How long do UV-printed graphics last?
With proper materials, lamination, and maintenance, UV-printed graphics can last several years indoors and perform reliably outdoors as well.